Saturday, August 25, 2012

25 Minute Cinnamon Rolls


"Time saver. Interesting. Delicious. Amazing in its simplicity. Ingenious."

I don't know if you've ever tried making home made cinnamon rolls, but anyone who has would know that they are SO time consuming.  With making the dough, adding yeast, kneading the dough, and letting it rise...who has the time???  Well, now you can make home made cinnamon rolls in minutes.  I was super skeptical of this recipe when I saw it, but it looked so yummy that I just had to try it.  I used whole wheat bread, since it was all I had, and they still turned out phenomenal.  I can't even imagine how yummy white bread or cinnamon bread or cinnamon raisin bread would taste.  They truly taste like a home made cinnamon roll...so buttery and cinnamon-sugary. My parents and I gobbled so many of them down, especially since they are pretty small.  And with home made cream cheese icing...oh my word.  They were heavenly They reheat well the next day, too.

Yield: 12 small rolls

Ingredients:
12 slices of fresh bread
melted butter
1 cup granulated sugar
3 tbsp cinnamon powder

Instructions:
1. Preheat the oven to 190C (375F).
2. Combine the sugar and cinnamon in a small bowl.
3. Cut the crusts off each slice of bread. Using a rolling pin, roll each slice as thinly as you can. 4. Spread both sides of the piece of bread with melted butter. Coat one side of the buttered bread with the cinnamon sugar, ensuring that it is generously covered. Roll as desired (be as creative as you like) and fit the cinnamon roll into a greased mini muffin tray. 

5. Repeat with the remaining slices. Bake for 15-20 or until golden brown. Cool in tray a few minutes before removing. Serve warm, as is, or with frosting and/or crushed nuts. 

***adapted from Lickthatspoon

Friday, August 24, 2012

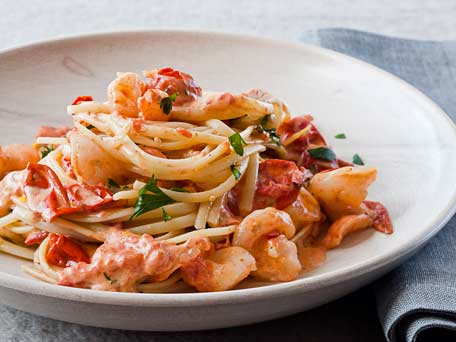
Pasta with Shrimp and Creamy Roasted Tomatoes


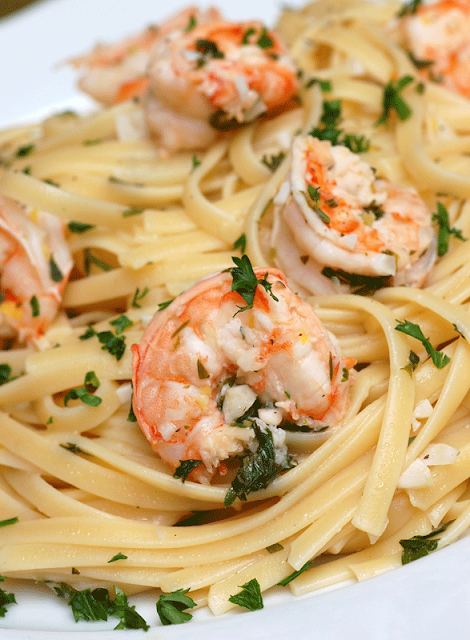
I'm on a roll with the shrimp recipes lately. My Garlicy Shrimp Scampi , New Orleans Barbecue ShrimpSweet and Spicy Honey Grilled Shrimp Skewers, and (my personal favorite) Lemony Asparagus Pasta with Shrimp are all incredible.  I'm a sucker for creamy pastas and juicy shrimp, so this recipe had my name all over it when I first saw it on Recipe.com.  I love the idea of roasting the tomatoes and adding them to a creamy sauce...this makes such a wonderful, roasted-tomato flavor.  Heavy cream also makes everything better, causing this sauce to be super creamy and comforting.  This has big, flavorful shrimp swimming in a roasted tomato-creamy sauce.  The sauce isn't too tomato-y, which I really liked, and has a touch of lemon flavor...very refreshing.  It was rich and filling (from the heavy cream), yet light and summery (from the lemon flavor and shrimp) at the same time. There is also a perfect amount of sauce in proportion with the pasta and shrimp.  If you like lots of shrimp, use two pounds.  If you prefer less shrimp, then use one pound.  I used two pounds and there was lots of flavorful, big, juicy shrimp with every bite.  My parents said this was "restaurant quality"...I totally agree.

Yield: about 4 servings

Ingredients:
1 1/2 cups grape tomatoes
1 tablespoons extra-virgin olive oil
1 teaspoon fresh thyme leaves
Kosher salt and freshly ground pepper
3/4 pounds pasta (of your choice) 
1 cup heavy cream
1 to 2 pounds large shrimp, shelled and deveined
2 teaspoons fresh lemon juice
1 teaspoons finely grated lemon zest
2 tablespoons coarsely chopped fresh flat-leaf parsley 

Directions:
1.
Preheat the oven to 375 degrees. In a large ovenproof skillet, toss the tomatoes with the olive oil and and thyme and season with salt and pepper. Roast the tomatoes for about 25 minutes, until starting to brown and their skins split.
2.
Meanwhile, in a large pot of boiling, salted water, cook the pasta until al dente; drain.
3.
Add the cream and a generous amount of salt and desired amount of pepper to the tomatoes and bring to a simmer. Cook over moderate heat, gently crushing the tomatoes, until the cream thickens slightly, about 3 minutes. Add the shrimp*** and simmer over moderate heat until cooked through, about 2-4 minutes.  Season with more salt and pepper. Add the pasta to the skillet along with the lemon juice and toss over low heat until the pasta is coated, about 1 minute. Add the lemon zest and parsley and toss. Add more salt and pepper to taste.  Transfer the pasta to warm bowls and serve at once.

***If using 2 pounds of shrimp, cook the shrimp in 2 batches, transferring the first batch to a plate with a slotted spoon and keeping warm with foil.  Add first batch of shrimp to pasta in the end.


***adapted from Recipes.com

Thursday, August 23, 2012

Banana Crumb Muffins


These banana crumb muffins are so delicious that they are the number one recipe on allrecipes.com.  I'm talking about number ONE....numero uno!  Out of what...like MILLIONS of recipes on that site??  Okay, I'm not sure exactly how many recipes there are, but there has to be at least thousands.  Well...it's number one for a reason: they are magnificently scrump-ti-dee-ump-cious. I've never had such a good banana muffin in my entire life.  The only thing I did differently from the original recipe was use one more banana, use super ripe bananas (I'm talking completely brown and gross-looking), cook for a little less time, and adjust the quantity. They are so moist and fluffy, with the perfect amount of sweetness and just the right amount of banana flavor.  They don't even need nuts, chocolate chips, vanilla, cinnamon (besides in the topping), or nutmeg!  Sounds crazy, but I promise the flavor is absolutely perfect as is.  The thing that really sets these muffins over the top is the crumb topping.  It's brown sugary-buttery-cinnamony delight and it's my favorite part about these muffins.  These are delicious served warm, and also very yummy at room temperature.

Yield: about 12 muffins

Ingredients:

  • 1 1/2 cups all-purpose flour
  • 1 teaspoon baking soda
  • 1 teaspoon baking powder
  • 1/2 teaspoon salt
  • 4 medium, very ripe bananas, mashed
  • 3/4 cup white sugar
  • 1 egg, lightly beaten
  • 1/3 cup butter, melted, and cooled slightly
  • 1/3 cup packed brown sugar
  • 2 tablespoons all-purpose flour
  • 1/8 teaspoon ground cinnamon
  • 1 tablespoon butter

Directions:

  1. Preheat oven to 375 degrees F (190 degrees C). Lightly grease 12 muffin cups, or line with muffin papers.
  2. In a large bowl, mix together 1 1/2 cups flour, baking soda, baking powder and salt. In another bowl, beat together bananas, sugar, egg and melted butter. Stir the banana mixture into the flour mixture just until moistened. Spoon batter into prepared muffin cups.
  3. In a small bowl, mix together brown sugar, 2 tablespoons flour and cinnamon. Cut in 1 tablespoon butter until mixture resembles coarse cornmeal. Sprinkle topping over muffins.
  4. Bake in preheated oven for 16 to 20 minutes, until a toothpick inserted into center of a muffin comes out clean.

*adapted from Allrecipes.com

Saturday, August 18, 2012

BEST Fudgy Brownies


Ohhh the love of brownies....I don't know even know where to begin.  They truly are the key to any person's heart.  If you ask somebody what they crave the most for dessert, brownies are always one of the first things that come to mind.  What's not to love about a fudgey, moist, chocolatey explosion of pure deliciousness??? I made these brownies for a bake sale at my school, and they vanished in - literally - minutes.  I almost didn't bring them to the bake sale because I wanted the whole pan for myself.  They are super duper moist on the inside (due to a low amount of flour/dry ingredients and many eggs/wet ingredients), with a perfectly cracked, thin, crispy surface - everything you could possibly dream of the perfect brownie to be.  The melted chocolate chips in the brownies give an incredibly amazing flavor that cocoa powder just can't compete with. Using butter instead of vegetable oil also makes them wonderfully rich.  And the addition of dark chocolate chips and coffee allow the pure chocolate flavor to really pull through without being overly sweet.  These are incredible served warm with vanilla ice cream (french vanilla is my fave), and also killer at room temperature.  One thing I wouldn't do is frost these brownies because they're so perfectly rich by themselves and may be too sweet if frosted.  When you make this recipe, I guarantee you will never, ever, ever buy box mix brownies EVER again.

Yield: one 13x9 inch pan (about 16 servings)

Ingredients:

  • 1 1/2 cups all-purpose flour
  • 1 teaspoon baking soda
  • 1/2 teaspoon salt
  •  
  • 1 1/2 cups white sugar
  • 1/4 cup strongly brewed coffee
  • 2/3 cup butter
  • 1 (12 ounce) bag semisweet chocolate chips
  • 2 teaspoons vanilla extract
  •  
  • 4 large eggs 
  • 1 (12 ounce) bag bittersweet chocolate chips  (I used Ghirardelli 60% cocoa)
  • 1 cup coarsely chopped walnuts  (optional)

Directions:

  1. Preheat an oven to 325 degrees F (165 degrees C). Combine the flour, baking soda, and salt in a small bowl; set aside. Grease a 13x9-inch baking dish.
  2. Combine the sugar, coffee, and butter in a saucepan. Cook and stir over medium heat until the butter has melted and the sugar has dissolved. Remove from the heat and stir in semi-sweet chocolate chips and the vanilla extract until the chocolate has melted. Pour the mixture into a mixing bowl, and beat in the eggs one at a time until smooth. Fold in the flour mixture until incorporated, then fold in the bittersweet chocolate chips along with the (optional) walnuts. Pour into prepared pan.
  3. Bake in the preheated oven until the top is dry and the edges have started to pull away from the sides of the pan, 40 to 50 minutes. Cool for at least 15 minutes before serving warm.  If serving at room temperature, cool completely before cutting into bars.

Sunday, August 12, 2012

Best Scrambled Eggs EVER!


These truly are the BEST scrambled eggs in the entire world.  They are so incredibly fluffy and creamy and just perfect in every way possible.  The secret?  Heavy cream.  Oh yesss...heavy cream makes everything better.  These may not be the healthiest eggs in the world, but they sure are the tastiest.  Cooking them in the microwave assures that they don't cook to fast and brown on the outside, like they do in a skillet.  I will never make eggs another way again - these are just too good.


Yield: one large serving, or 2 small servings

2 large eggs
3.5 tablespoons heavy cream 
2 tablespoons water
a pinch of salt
a dash of pepper 

additional salt and pepper for serving

Break eggs into a microwaveable plastic measuring container. Add the heavy cream, water, salt and pepper. Whisk vigorously until well combined and fluffy, about 1 minute. Place the container in the microwave and set on high. Check every 20-30 seconds, gently swirling the container to shift the cooked egg and coat with it with uncooked egg. Repeat until  the liquid egg is significantly reduced. Fold the cooked egg in with the raw gently using a spatula (do not break it up too much!) Microwave again until you get moist, creamy, folded eggs. The success is in the folding, and not letting any part of the egg become dry and over cooked. Sounds too easy? It is. Best eggs ever.


Want to watch me do it? I'll go through the folding with you. And give you a running commentary.

Your egg mixture should look a bit like this after the first 30 seconds or so of cooking. Of course, this depends upon the power of your microwave. See how the edges are starting to cook yet the centre is still very liquid? Just give it a swirl in the bowl. No spoons yet! Pop it back in the microwave for 30 seconds.


Remove from the microwave and swirl again. Try to get the liquid egg mixture on top of the cooked edges. We don't want that egg to dry out! Pop it back in for another 30.


Repeat the above process, covering the cooked edges with the egg liquid every time, with a simple swirl of the bowl. It's a very gentle process, as we don't want to break up the egg too much, we just want the cooked egg to shift so it doesn't dry out.


There will come a stage where the cooked egg on the edges is quite thick and the uncooked centre reduces in size. If the cooked egg no longer moves when you swirl the bowl, gently ease it off the side with a spatula.


I'm just going to take a moment here to say YUM! I simply LOVE these scrambled eggs we're making. They're...well, you'll find out. Okay. Stick it back in the microwave, we're almost there!


Be careful at this stage where there isnt much liquid egg left, because the cooked egg can dry out if not watched well. Get your spatula and gently fold the cooked egg into the uncooked to moisten it. You can now set it aside! The heat in the cooked egg will cook the rest on its own.
If the scrambled egg looks dry, you can try and save it by adding a dob of butter to the top and letting it melt in. It should moisten the egg sufficiently. Serve immediately.  Add more salt and pepper to taste.


If your using one egg instead of two, I recommend cooking the egg at 15 second increments.


***Adapted from Lick The Spoon

Garlicky Shrimp Scampi


Mmmm...butterygarlicy shrimp...who doesn't love that? This quicksimple meal is so savory and flavorful.  If you're a garlic lover, like my family, then you're sure to love this recipe.  I guarantee it will be a staple in your home once you try it...it certainly is in mine.   I decided that I will now never order shrimp scampi in a restaurant - this recipe is sure to top it! It can be served as it is (without pasta) as an appetizer, but I served this over pasta with a side salad and garlic bread for dinner.  Yum yum yum!  Such a perfect meal.

Yield: about 4 servings

Ingredients:

  • 6 tablespoons unsalted butter, softened
  • 1/4 cup olive oil
  • 6 medium-large garlic cloves, minced 
  • 1 tablespoon minced shallots
  • 2 tablespoons minced fresh chives
  • salt and freshly ground black pepper to taste  (I recommend adding lots of each, mainly salt)
  • 1/2 teaspoon paprika
  • 2 pounds large shrimp - peeled and deveined

Directions:

  1. Preheat oven burner for medium high heat.
  2. Place 2 tablespoons of the butter and 1 tablespoon of the olive oil in the preheated skillet.  Cook until shrimp are pink and fully cooked through, about 6-7 minutes.  
  3. Once cooked, set skillet aside and add the remaining 4 tablespoons butter, 3 tablespoons olive oil, garlic, shallots, chives, salt, pepper, and paprika. 
  4. Set the burner for low heat, wait a minute or two for the burner to reach the low setting, and return skillet to burner.  Stir mixture until everything is well combined and butter is completely melted.
  5. Let sit with the lid covered for at least 15 minutes before serving.  Serve over pasta if desired.

Wednesday, August 8, 2012

Glazed Spice-Cake Donut Muffins


I love spice cake.  I love donuts.  I love muffins.  Why not combine them all?  This recipe does not result in your typical Krispy Kreme, fried donut...although the glaze is quite similar.  The texture is more of a cake donut consistency, with a wonderful, spiced flavor.  They are the perfect thing to have in the morning with a warm, cup of coffee...so comforting, and very suitable for dunking.  They also keep well for a couple days (for best taste, no more than three), and who doesn't love leftovers? Another thing I love about this recipe is that there are so many options on how to prepare the batter.  You can bake them: into mini muffins (just reduce baking time), on parchment paper or greased baking sheet to create muffin top cookies, into one, large pan to create a snack cake/quick bread, in a donut pan, and/or you can frost them with cream cheese icing.  However, I absolutely adore this recipe the way it is - no alterations necessary.  

Yield: 12 muffins

Ingredients:

For the muffins:
  • 1 cup white sugar
  • 2 teaspoons baking powder
  • 1 teaspoon baking soda
  • 1 teaspoon ground nutmeg
  • 1/2 teaspoon ground cloves
  • 2 teaspoons ground cinnamon
  • 3 cups all-purpose flour
  • 1 cup buttermilk, at room temperature
  • 3 eggs, at room temperature
  • 1 tablespoon maple syrup
  • 1/2 cup butter, melted and cooled slightly

For the Glaze:
3 tablespoons butter, melted
1 cup confectioners' sugar; sifted
3/4 teaspoon vanilla extract
2 tablespoons hot water

Directions:

  1. Preheat oven to 400 degrees F (200 degrees C). Lightly grease a medium muffin pan with cooking spray, or line with paper liners.
  2. In a medium bowl, mix sugar, baking powder, baking soda, nutmeg, cloves, cinnamon and flour. Whisk buttermilk, eggs, maple syrup, and butter in a separate medium bowl until just combined, and stir into the dry ingredients. Do NOT over mix. Spoon the mixture into the prepared pan, about 3/4 of the way full.
  3. Bake 12 minutes in the preheated oven, until golden brown.  Let rest for at least 5 minutes before removing from pan to wire rack.
  4. For glaze, combine melted butter, confectioners' sugar, vanilla, and hot water in a medium bowl.  Whisk until smooth.  When muffins have cooled slightly, dip the muffin crown into the glaze.  Serve warm or at room temperature.


Sunday, August 5, 2012

Grilled Bell Peppers With Cheese


Yield: about 4 servings

Peppers and cheese?  Umm.....yum!  This is such an easy, quick recipe that's nearly impossible to mess up.  They are tangy with the cheese, and the tart lemon pepper with the charred grilled pepper is to die for. Don't let the simplicity of this recipe scare you.  And do not skimp out on the lemon pepper!  My dad says he hates lemon pepper, but he absolutely LOVED this dish!  The flavors pair so incredibly well together.  I served this as a side to turkey brautworst and chicken sausage.  Mmm...such a good pairing!

Ingredients:

  • 2 green bell peppers
  • 1 clove garlic, minced
  • 2 tablespoons olive oil
  • 1/2 cup crumbled goat cheese, feta cheese, and/or blue cheese
  • 1 tablespoon lemon pepper seasoning

Directions:

  1. Core and seed the bell peppers. Cut each into six wedges, and place into a resealable plastic bag. Add the garlic and drizzle with olive oil. Toss, seal, and set aside to marinate at least 20 minutes.
  2. Preheat an outdoor grill for medium heat, and lightly oil the grate. Stir the cheese and lemon pepper seasoning together in a small bowl; set aside.
  3. Cook the peppers, skin-side-up on the preheated grill until lightly charred, about 3 minutes. Flip the peppers over, and carefully spoon the cheese onto each pepper. Close the lid of the barbecue, and continue cooking until the bottoms are lightly charred and the cheese is warm, 2 to 3 minutes.

Saturday, August 4, 2012

Blueberry Cornmeal Pancakes


Ohmygosh.  These were just too good.  This is my new all time favorite pancake recipe ever.  When I say these melt in your mouth, they literally MELT IN YOUR MOUTH.   Your fork will cut through them like butter. They are incredibly soft, fluffy, and full of flavor.  Most basic pancake recipes are pretty tasteless besides the add-ins you put in them, but this batter - even without the blueberries - has a wonderful sweet and salty taste that seriously tastes like not only the the best pancakes you'll ever have, but the best cornbread as well.  If you were to take the cornbread taste of this pancake, and put it into an actual, thicker, baked pan of cornbread, that pan of cornbread would be the bomb!  I served this recipe with my buttermilk syrup (here) and it was absolutely to die for.  My family all agrees that I have to make it again very soon.  Aaaand I'm going to request this on my birthday.  Yup...it's that special.  I adapted it from a Martha Stewart recipe, and my version is one of those rare recipes where I wouldn't change anything about it.


Yield: about 4 servings (about 1 dozen 5- to 6-inch pancakes)


Ingredients:

  • 1 cup all-purpose flour
  • 1/2 cup cornmeal
  • 1/4 cup white sugar, plus 1 tablespoon
  • 1 1/4 teaspoons baking powder
  • 1 teaspoon coarse salt
  • 1/2 teaspoon baking soda
  • 1 1/2 cups low-fat buttermilk
  • 1/4 cup milk 
  • 1 1/2 ounces (3 tablespoons) unsalted butter, melted and cooled, plus more for griddle
  • 1 large egg, lightly beaten
  • 2 cups (1 pint) blueberries

  •                 whipped cream (optional)

  • Instructions:
  1. Whisk together flour, cornmeal, 1/4 cup white sugar, the baking powder, salt, and baking soda. In another bowl, whisk together buttermilk, milk, butter, and egg. Whisk wet ingredients into dry ingredients until just combined (mixture will be lumpy).
  2. Preheat oven to 200 degrees. Heat a griddle or large nonstick skillet over medium-low heat. Toss blueberries with remaining tablespoon of sugar. Brush griddle with melted butter. Spoon batter onto griddle 1/3 cup at a time. Sprinkle with sugared blueberries, about 2 tablespoons per pancake. Cook until edges are set, 4 to 5 minutes. Flip, and cook until golden brown, about 2 minutes. Repeat with remaining batter and blueberries, adding more butter to griddle and keeping prepared pancakes warm on a baking sheet in the oven. Serve with desired syrup(s) and/or whipped cream.

Friday, August 3, 2012

New Orleans Barbecue Shrimp


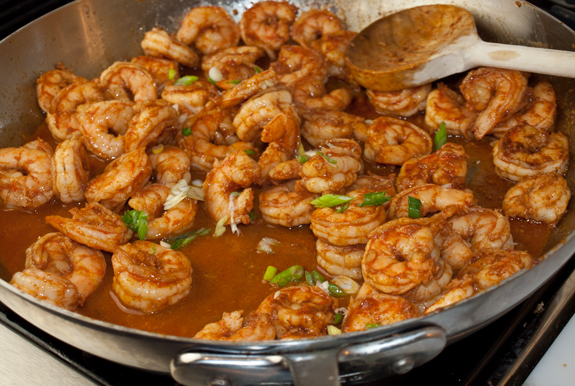
I'm usually not a fan of spicy things, but boy was this tasty!   I really recommend making it spicy.  Add lots of salt and cayenne in the end.  I don't know why, but this dish is so, so, so yummy and especially flavorful when spicy.  It's adapted from America's Test Kitchen, who have never failed to impress me with their recipes. Here's the description on the recipe:
We started by determining the best cooking method for our version of New Orleans Barbecue Shrimp; in this case, searing the shrimp first, then sautéing the aromatics before returning the shrimp to the skillet to gently finish cooking in the rich sauce proved best. Sautéing the aromatics with some tomato paste enriched the sauce—the paste also reinforced the “barbecue" color.
To thicken the sauce, we turned to a classic New Orleans technique for thickening: starting the sauce with a roux. A bit of flour added to the sautéing aromatics created a sauce that was thick enough to coat the shrimp. Instead of a time-consuming seafood stock, we used bottled clam juice as the base for our sauce. To round out the liquid, tasters preferred mellow beer to acidic wine.
Seems like they know what they're talking about...am I right?  They also said: although authentic barbecue shrimp is always made with shell-on shrimp, peeled and deveined shrimp may be used. Light- or medium-bodied beers work best here. Serve with Tabasco sauce and French bread, if desired.
Definitely serve this wish French bread!!  It does a wonderful job of soaking up all of the yummy sauce.  I wish I had made more of this to have as leftovers...but there were none left!
Ingredients:
  • 2pounds extra-large shrimp, peeled (21-25 per pound)
  • 1/2teaspoon salt
  • 1/2teaspoon cayenne pepper
  • 2tablespoons vegetable oil
  • 6tablespoons unsalted butter, cut into 6 pieces
  • 2teaspoons all-purpose flour
  • 1teaspoon tomato paste
  • 1teaspoon minced fresh rosemary
  • 1teaspoon minced fresh thyme
  • 1/2teaspoon dried oregano
  • 3garlic cloves, minced
  • 3/4cup bottled clam juice
  • 1/2cup beer
  • 1tablespoon Worcestershire sauce
  •                       Additional salt, cayenne pepper
  •                       Hot sauce (optional)
Instructions: 
  • 1. Sear shrimp: Pat shrimp dry with paper towels and sprinkle with salt and cayenne. Heat 1 tablespoon oil in large skillet over medium-high heat until just smoking. Cook half of shrimp, without moving, until spotty brown on one side, about 1 minute; transfer to large plate. Repeat with remaining oil and shrimp.
  • 2. Make Sauce: Melt 1 tablespoon butter in empty skillet over medium heat. Add flour, tomato paste, rosemary, thyme, oregano, and garlic and cook until fragrant, about 30 seconds. Stir in clam juice, beer, and Worcestershire, scraping up any browned bits, and bring to boil. Return shrimp and any accumulated juices to skillet. Reduce heat to medium-low and simmer, covered, until shrimp are cooked through, about 2 minutes. Off heat, stir in remaining butter until incorporated. Add more salt and cayenne to taste.  Serve and garnish with hot sauce if desired.

Thursday, August 2, 2012

Whole Wheat Chocolate Chip Muffin For One


Okay.  I've had a slight chocolate chip muffin obsession lately.  Especially after eating so many of these.  Are you one of those people that are really tempted to eat the entire batch of muffins you make?  Yeah...I totally know the feeling.  So I decided to create a single chocolate chip muffin, that was actually (somewhat) healthy. I had no idea if it would turn good, since it made such a small amount, but I'm not kidding you when I say: this muffin tasted awesome. It uses whole wheat flour (yeah fiber!),  you can make it low fat with your choice of the type of butter and milk you use, and it's sugar free (minus the chocolate chips...but you can add other add-ins).  I actually regret making just one serving because I really wanted someone else to taste it so they could share the {happy feeling} my belly was having after eating this yummy little indulgence.  I bet this tastes even better than your favorite chocolate chip muffin recipe (it tastes very similar to my all-time favorite chocolate chip muffin recipe here).

Ingredients:
  • 2 Tbsp whole wheat flour (or white whole wheat)
  • 1 Tbsp all-purpose flour
  • 1/4 tsp baking powder
  • dash of salt
  • 1.5 Tbsp chocolate chips (feel free to use other add-ins, like nuts and/or coconut, etc.)
  • 1/2 tsp vanilla extract
  • 1 Tbsp unsalted butter, melted, and cooled slightly (you can use low fat if you want)
  • 1 Tbsp + 1 tsp milk (I used soy, but any other type will do)
  • 1 Tbsp sweetener (I used Stevia, but any other sweetener is fine too)
Instructions:
  1. Preheat oven to 330 degrees. Grease one muffin cup or line muffin tray with 1 liner. Set aside.
  2. Mix flours, baking powder, salt, and chocolate chips together in one bowl.  Combine vanilla, melted butter, milk, and sweetener in another bowl.  Add wet ingredients to the dry, and mix until just combined. DO NOT overmix (overmixing will create a hard/tough muffin).
  3. Pour batter into prepared muffin tin. Bake for 14-17 minutes, or until a knife inserted in the center comes out with just a few crumbs on it. Let cool at least 5 minutes in pan before removing.