Showing posts with label chocolate. Show all posts

Sunday, July 14, 2013

Chocolate Chip Cookie Dough Cheesecake Bars


First off, I sincerely apologize for not blogging in such a long time. The end of my junior year in high school was...well - INSANE. But now it's summer! And all my hard work was totally worth it. Now I am officially a senior! 

You wanna know what I'm pumped about the most for this summer? BAKING! So my first post of the summer is this absolutely incredible recipe for cookie dough cheesecake bars. Oh my goodness, are they something magical. These scrumptious treats are the perfect combination of cheesecake and chocolate chip cookie dough. Can you even think of a more amazing pairing? I sure can't. I brought a full pan of these to a cross country party and they literally vanished before I could even blink. I guess you could say my parents were more than a little disappointed that I came home with an empty tray...

The recipe begins with a fool-proof, classic graham cracker crust. Above the crust lies another perfect, creamy layer of luscious cheesecake, wonderfully vanilla-y and delicious. Last but not least, my personal favorite layer is at the top: the cookie dough. Ahh cookie dough....my love...buttery and brown-sugary and studded with chocolate chips....can you say YUM??? This cookie dough is egg-less, so it's safe to eat (yes, by the spoonful if you wish). Together, the three layers form this heavenly dessert that you won't be able to resist.


Yield: about 12 bars

Ingredients:
Crust
1 1/2 cups graham cracker crumbs
1 teaspoon ground cinnamon
5 tablespoons unsalted butter, melted


Cookie Dough
5 tablespoons unsalted butter, room temperature
1/3 cup packed light brown sugar
3 tablespoons granulated sugar
1/4 teaspoon salt
1 teaspoon pure vanilla extract
1/2 cup all-purpose flour
3/4 cup chocolate chips


Cheesecake Filling
10 ounces cream cheese, at room temperature
1/4 cup granulated sugar
1 large egg, at room temperature
1 teaspoon vanilla extract

Instructions:
1. Preheat the oven to 325 F. Line an 8 inch square baking pan with parchment paper or foil allowing a little overhang and spray with nonstick cooking spray. Set aside.
2. Mix the melted butter, cinnamon, and graham cracker crumbs until thoroughly combined. Press the mixture into the bottom of the prepared pan. Bake in preheated oven for 6 minutes. Remove pan to a cooling rack. Leave your oven on while you prepare the dough.
3. While the crust is cooling, prepare the chocolate chip cookie dough. In the bowl of a stand mixer fitted with the paddle attachment or in a large bowl with an electric mixer, beat butter, brown sugar, granulated sugar, salt and vanilla until smooth and thoroughly combined, about 1 minute. Mix in the flour on low speed, and mix until just incorporated. Mix in the chocolate chips. Set aside. (Note: if the cookie dough looks a little dry, it's fine. It will be crumbled on top of the cheesecake layer.)
4. In the bowl of a stand mixer fitted with the paddle attachment or in a large bowl with an electric mixer cream together the cream cheese and sugar until smooth. Mix in the egg and vanilla on low speed just until incorporated. Pour the cheesecake batter into the prepared crust. Use your hands to form "clumps" of the cookie dough, smoosh it together and flatten it out.  Distribute the cookie dough onto the top of the cheesecake batter in teaspoon-sized clumps. Be sure to use all of the dough.
5. Bake for about 30 minutes, until the top feels dry and firm (the cookie dough) and the entire pan looks set if given a gentle shake. Move bars to a cooling rack and allow to cool completely. Chill in refrigerator overnight or for at least a couple hours.
6. Lift the bars out by the overhang and cut into squares for serving.

**Note: these taste best at room temperature.


Tuesday, July 31, 2012

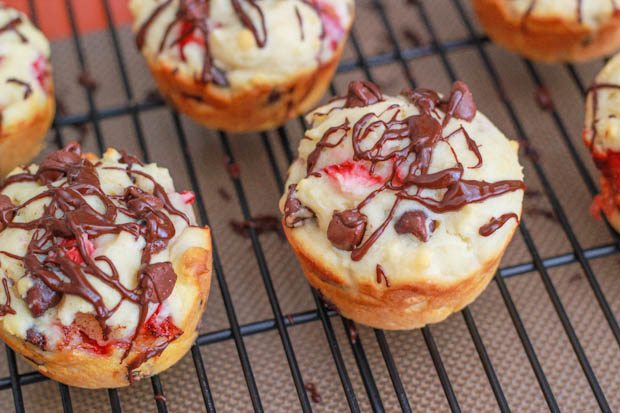
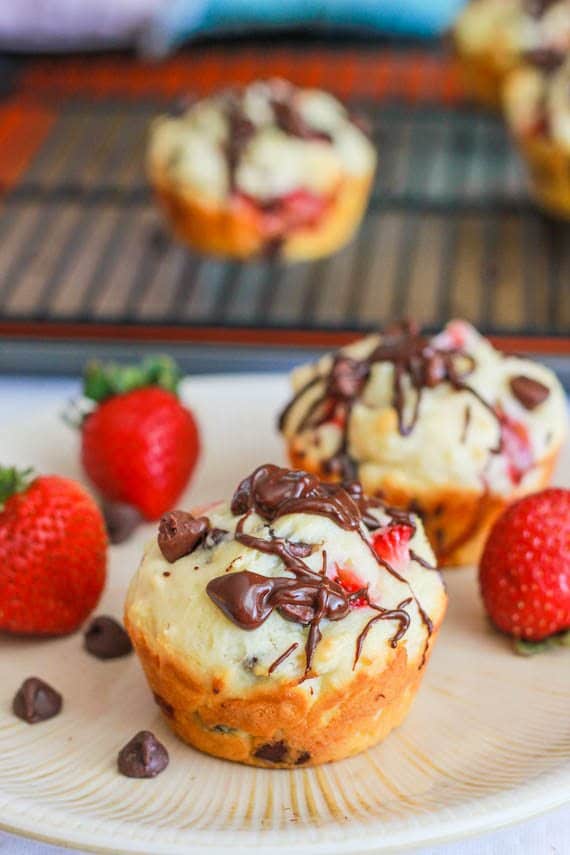
Chocolate Covered Strawberry Muffins


I think we can all agree that chocolate and strawberries are a match in heaven.  Am I right??? 


Heck to the yesssssss.


I had some fresh strawberries in my refrigerator yesterday morning, and I wanted to use them up in some kind of super yummy recipe.  Aaaand I was craving chocolate (when am I not??).  So I figured...why not make something with chocolate and strawberries?  I wasn't really craving pancakes, and I could have easily made chocolate chip pancakes and threw some strawberries on top.  I wanted something more creative.  Oatmeal?  Nahh...too boring.  And then a little light bulb went off in my head and I decided muffins.  Oh how I loveee muffins!  I call them "breakfast's cupcake."  Many people wonder the difference between a cupcake and a muffin, and you are gonna realize that you already know the answer once I tell you: Cupcakes are more cakey.  I know.  You totally knew that already, right?  Cupcakes are also more light and fluffy, whereas muffins are more dense (but not too dense! More like pound cake.), chewy, and bready.  A cupcake batter can be made into a cake, but if you were to pour muffin batter into a cake pan, it may not turn out the same.  

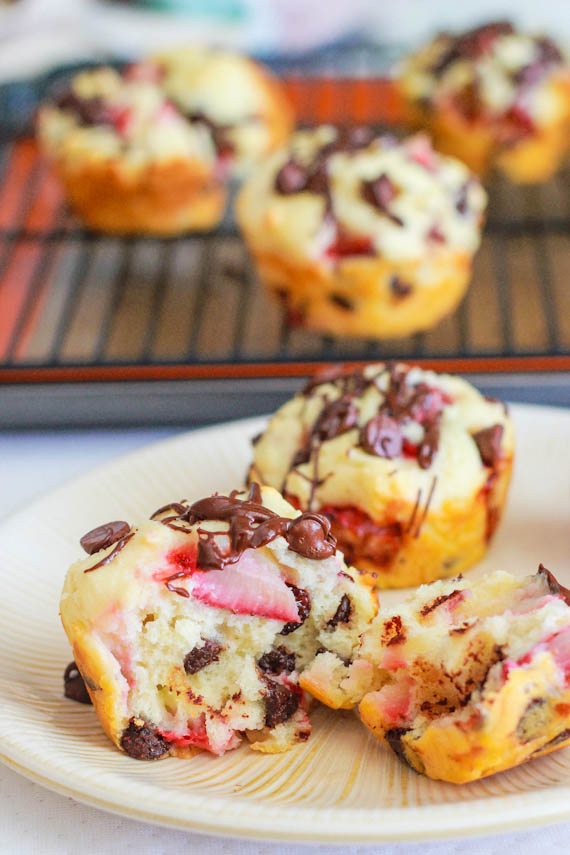
Okay, now back to this recipe.  A really, really good muffin should have a very moist texture, similar to a cupcake but still a little more dense.  This recipe is the definition of a perfect muffin.  I's everything you could dream your perfect muffin should be like. The muffin is so moist from the sour cream, and wonderfully fluffy.  It's light, though not quite as light as a cupcake.  So chocolatey (did I mention they have a chocolate drizzle, in addition to the chocolate chips already in it? Genius.), and filled with sweet chunks of delicious, fresh strawberries.  These taste SO GOOD hot from the oven with whipped cream.  Ohmygoodness...my mouth is watering just thinking of how yummy they were.  I tasted one this morning (24 hours later) at room temperature and it was still awesome.  However, I recommend heating it up, to make it even more awesome.  But I do think it was best out of the oven.  I cannot wait to make these again, but I think next time I'll try them white white chocolate chips and/or vanilla chips!  Mmmm!  These, unfortunately, were not my original recipe...so I cannot take the spotlight.  I recently discovered a wonderful blog called Sally's Baking Addiction, and you can find the recipe from her...here.

Tuesday, June 19, 2012

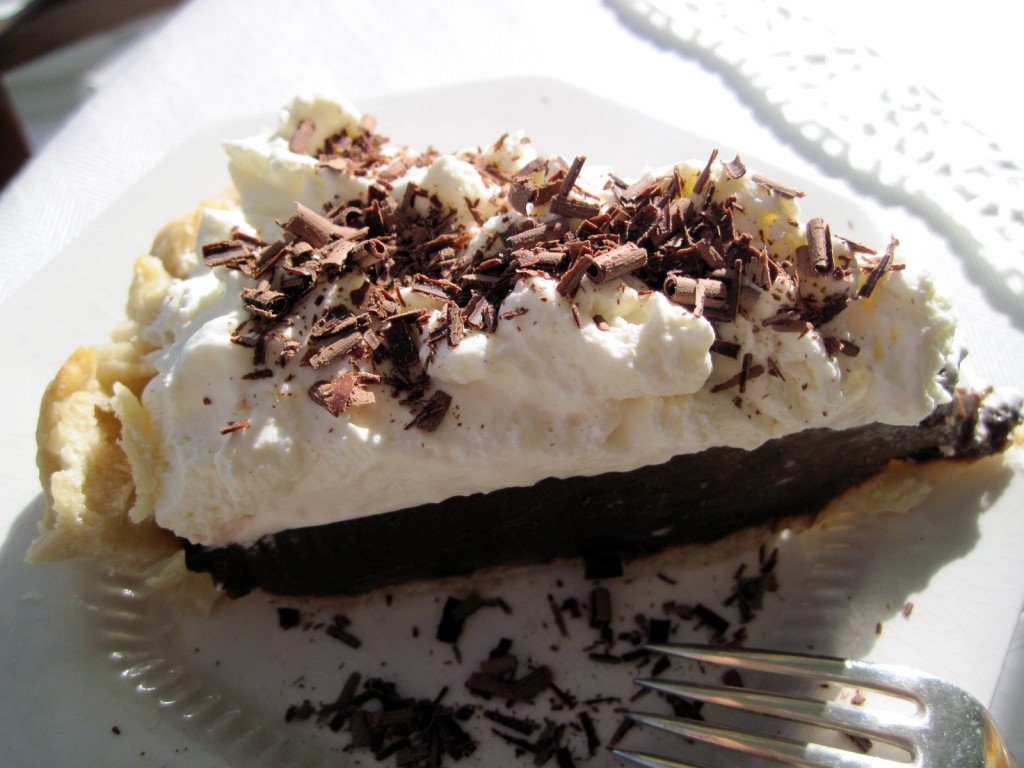
Chocolate Cream Pie


Chocolate Pie

IMG 2352 1024x768 Chocolate Cream Pie

I'm drooling right now just looking back over these pictures.  I made my daddy a chocolate cream pie for Father's Day, and it was declared by him "the best pie he's ever had."  I couldn't believe how perfect it turned out.  It was so, so, so easy to make - yet tasted sinfully rich.  The crust is just a basic, flaky pie crust; I wouldn't use any other crust on this if you mainly want to taste the chocolate layer.  This layer is rich, fudgey, silky, and oh-so chocolatey.  It's also kind of thin, but you definitely won't mind because it's so rich anyways.  And even though it is very rich, it doesn't fill you up like a cheesecake would (since it's a thin layer) - so you will definitely want to go back for seconds(:  This pie was over half way eaten the first night I made it!  And that's just between my mom, dad and I, and it was right after we'd gone out for Father's Day dinner. This is definitely the only chocolate cream pie I will ever use from now on!

Yield: 1 9-inch pie

Ingredients:

  • 1 (9 inch) pie crust, baked
  • 1 1/4 cups white sugar
  • 2 tablespoons all-purpose flour
  • 2 tablespoons cornstarch
  • 1/4 teaspoon salt
  • 1 1/2 cups milk
  • 4 egg yolks
  • 2 (1 ounce) squares unsweetened chocolate
  • 1 tablespoon butter
  • 1 teaspoon vanilla extract

Thawed Cool Whip or home made whipped cream
Chocolate shavings, toasted coconut, or chopped candy bar pieces

Directions:

  1. In medium saucepan, combine sugar, flour, cornstarch and salt. In a medium bowl, beat milk and egg yolks until smooth. Gradually stir into sugar mixture. Stir constantly over medium heat until mixture thickens and comes to a full boil. Boil and stir for one minute.
  2. Remove from heat and stir in chocolate, butter and vanilla. Stir until melted.
  3. Pour into pie shell. Place plastic wrap over filling to prevent skin from forming and chill for several hours. Top with Cool Whip or whipped cream and toppings if desired.

Tuesday, June 5, 2012

Baked Toffee Apple French Toast


The flavors of this dish were so unique!  Who knew that apples, cream cheese, vanilla, chocolate, and toffee would all taste so delicious together??  I found this recipe at Betterrecipes.com, but I modified it a little to make it better (candy bar used, type of milk, type of apples, and bread cube size).  I was really skeptical before making it because there were no reviews and I had no idea if I was going to like apples and cream cheese and chocolate mixed together, but I definitely did!  The flavors blend perfectly together, and there's just the right amount of each ingredient.  The richness of the cream cheese and vanilla, combined with the slight tartness of the apples, with a slight burst of chocolate toffee was so amazing...and smells heavenly while baking.  The inside is super moist and comforting, and the very top is wonderfully crunchy.  The only change I may make next time I make it is to add a cinnamon brown sugar topping because some of the bread cubes sticking up at the top would have been really tasty with a sweet, crunchy, topping.  But it totally isn't necessary.  I would also love to try this with white chocolate chips instead of the heath bar..or just adding white chocolate chips to the heath bar.  I highly recommend serving this warm with whipped cream, and it's also very tasty chilled after sitting in the refrigerator.


Ingredients:
8 cupsCubed or torn French Bread, about 1" cubes
2Medium apples, peeled and chopped
1 pkg(8 Ounces) Cream Cheese, softened
¾ cupPacked Brown Sugar
¼ cupWhite Sugar
1¾ cupsWhole Milk
2 tspVanilla Extract, divided
½ cupEnglish Toffee Bits (such as Heath Bar)
5Eggs
DIRECTIONS:
Place half of the bread cubes in a greased 13-in. x 9-in. baking dish; top with apples. In a large bowl, beat the cream cheese, sugars, 1/4 cup milk and 1 teaspoon vanilla until smooth; stir in toffee bits. Spread over apples. Top with remaining bread cubes.
In another bowl, beat the eggs and remaining milk and vanilla until blended; pour over bread. Cover and refrigerate overnight.
Remove from the refrigerator 30 minutes before baking. Bake, uncovered, at 350F for 35-45 minutes or until a knife inserted near the center comes out clean.

Monday, May 28, 2012

Chocolate Waffles With Caramel Sauce and Ice Cream


Oh yesss...dessert for breakfast. That is my favorite thing in the entire world.  And what could be better than a waffle sundae for breakfast?  I can answer that ----> absolutely nothing! I woke up a few mornings ago craving something sweet, so I browsed through some of my recipes, and when I saw this - I knew it was the one.  Who can resist a chocolate waffle with home made caramel sauce, and ice cream??  Ice cream for breakfast is something I have a little too much(:  I guess you can say my sweet tooth was satisfied after I made these waffles. This recipe was absolutely heavenly.  The caramel sauce especially was the best caramel sauce I've ever had.  I'm gonna keep the recipe handy for future dishes, because it makes an incredible dessert topping and goes perfect with ice cream.  I used Ben and Jerry's American Dream Ice cream because that was what I had on hand (vanilla ice cream with caramel swirl and fudge covered waffle cone pieces...yum!!)  My parents and I gobbled these waffles up.  And my mom declared it the best thing she'd tasted in a long time.  I didn't disagree.

Ingredients:
For the Caramel Sauce:


1/3 cup brown sugar
1/3 cup heavy cream
4 tablespoons unsalted butter

For the Waffles:
4 tablespoons unsalted butter, melted
1 tablespoon unsweetened cocoa powder
1/3 cup sugar
1 egg, separted
1/2 cup all-purpose flour
1 teaspoon baking powder
1/4 teaspoon salt
1/3 cup milk
2 tablespoons chopped walnuts (optional)
Vanilla (or your choice of) ice cream, for serving
Chocolate shavings, for decoration

Instructions:

FOR THE CARAMEL SAUCE:
Combine all of the sauce ingredients in a small saucepan. Stir over low heat until the sugar dissolves. Bring to a boil, reduce heat and simmer, stirring, for 3 minutes.


FOR THE WAFFLES:
Combine the melted butter and cocoa powder and stir until well combined. Add the sugar and egg yolk and beat well.


Sift together all the dry ingredients and add to the chocolate mixture alternately with the milk. Beat the egg white until stiff. Fold into the chocolate mixture.


Heat a waffle iron and cook the mixture according to the manufacturer's instructions. Serve immediately with the Caramel Sauce, ice cream, nuts (optional) and shavings of chocolate.

Tuesday, April 10, 2012

Saint Patrick's Day Cake


This is officially the best cake I've ever had.  I was planning on making it for Saint Patrick's Day since it has that theme with the beer and Irish cream and all...but I never had time.  Sooo I decided to make it as my birthday cake instead!  I did only make one layer of this cake since there's only three people in my family and I wouldn't have wanted the cake to dry out if we didn't eat it in time.  If you choose to make one layer, then just half the recipe below.  But I recommend making the full amount because the cake lasts for a long time (I had the last slice today and it was the 3rd day, and it still tasted incredible) and you will definitely have no problem eating it all in a short period of time once you have your first slice.  I don't know about you guys, but I'm a huge sucker for alcoholic beverages in desserts.  I know...my parents aren't very happy about that...but I can't control my taste buds!  This cake is the absolute best chocolate cake/birthday cake/Saint Patricks Day cake I've ever tasted!  I think it's even better than my Best Chocolate Cake recipe (found here), which kind of defeats the title..but that recipe is still the best classic chocolate cake I've ever had.  However, this recipe is a little more jazzed up with the beer in the cake, the Bailey's buttercream frosting, and the chocolate ganache.  The chocolate cake layer itself is moist, rich, and perfectly dark chocolatey.  But the frosting and ganache is what really sets this cake from a 10 on a 1 to 10 scale to 100.  The Irish cream liquor gives this frosting an incredibly unique, sweet, and rich taste that I had never tasted before but instantly fell in love with.  If you are a big frosting fan, then I would recommend doubling it...it's very delicious to eat it by the spoonful as well(:  And then you have this incredibly chocolatey and rich deep chocolate ganache drizzled on top that makes the cake so beautiful and perfect.  I'm going to be making this for many holidays and birthdays to come in the future.

Ingredients:

Cake:
  • 1 cup Irish stout beer (such as Guinness®)
  • 1 cup butter, cut into pieces
  • 3/4 cup unsweetened cocoa powder
  • 2 eggs
  • 2/3 cup sour cream
  • 2 cups all-purpose flour
  • 2 cups white sugar
  • 1 1/2 teaspoons baking soda
  • 3/4 teaspoon salt
  •  
  • Frosting:
  • 3 cups confectioners' sugar, or as needed
  • 1/2 cup butter at room temperature
  • 4 tablespoons Irish cream liqueur (such as Baileys®), or as needed
  •  
  • Ganache:
  • 1 heaping cup of bittersweet chocolate chips (or dark chocolate chips)
  • 2/3 cup heavy cream
  • 2 tablespoons butter at room temperature

  • Directions:

    1. Preheat oven to 350 degrees F (175 degrees C). Line 2 9-inch cake pans with parchment paper, and spray with cooking spray.
    2. Pour the beer into a saucepan, add the butter, and bring to a simmer over medium-low heat. Remove the pan from the heat, and whisk in the cocoa powder until the mixture is smooth. Allow the mixture to cool. In a bowl, beat the eggs and sour cream together until smooth with an electric mixer, and stir in the stout mixture to make a smooth, thick liquid.
    3. In a large bowl, mix together the flour, sugar, baking soda, and salt. Pour the stout mixture into the flour mixture, and gently combine with a spatula. Pour the batter into the prepared pans.
    4. Bake in the preheated oven until the cakes are set and a toothpick inserted into the center of a cake comes out clean, about 30 minutes. Remove and let cool in pans for 5 minutes before inverting the cakes onto wire racks to finish cooling.
    5. Mix together the confectioners' sugar, butter, and Irish cream liqueur until the mixture forms a smooth and spreadable frosting (add more sugar or liqueur as needed to create the desired consistency). Spread half the frosting on top of each cake.
    6. Place the chocolate chips into a heatproof bowl. Bring cream to almost boiling in a small saucepan, and pour over the chocolate. Stir in the butter, and stir the mixture until the chocolate melts and the mixture is very smooth. Allow to cool until the mixture is pourable but not thin or overly runny, 10 to 15 minutes. Stack a cake gently on top of the other, frosting sides uppermost, and carefully drizzle the chocolate mixture over the cake, allowing decorative drips to run down the sides.

Friday, April 6, 2012

Chocolate Florentine Cookies

One night last week, I was in a baking mood (when am I not??) and browsed through my recipe folder, but everything was just kind of boring and same-old, same-old, when this caught my eye.  I'd heard of Florentine cookies, but they always seemed kind of difficult to make, so I never really gave them a shot.  I'm so glad I did though because they're amazingly delicious!! And way easier than I thought.  The hardest part was waiting for them to cool because I wanted to eat them so badly!   I did change up the original recipe to make it my own based on what I thought would taste best...and the result was perfect(: They're not very filling, so my dad and I (us being the chocoholics of the house) ate almost the entire batch that one night.  I've never had anything like them before, which makes me like them even more since they're so unique.  One suggestion: Make sure to follow the recipe exactly when it says drop by TEASPOONFULS THREE INCHES APART.  I didn't think they'd be big enough since the batter looks so small when you drop it, but they spread out a lot.  I did heaping teaspoonfuls for my first batch, and I ended up with one giant sheet of cookie since it spread out so much, so I had to break it into deformed pieces.  But hey - It's the taste that counts though, right?


Yield: about 20 cookies

Ingredients:

  • 1/3 cup butter, melted
  • 1 cups quick-cooking oats
  • 1/3 cup all-purpose flour
  • 1/8 teaspoon salt
  • 1/2 cup white sugar
  • 2 tablespoons corn syrup
  • 2 tablespoons milk
  • 1/2 teaspoon vanilla extract
  • 1 cup chocolate chips (i used half semi-sweet, half dark)

Directions:

  1. Preheat the oven to 375 degrees F (190 degrees C). Line 2 cookie sheets with aluminum foil and grease the foil.
  2. In a large skillet over medium heat, melt the butter. Stir together the oats, flour, salt and sugar; mix into the melted butter until well blended. Stir in the corn syrup, milk and vanilla. Drop batter by teaspoonfuls 3 inches apart onto the prepared cookie sheets.
  3. Bake for 5 to 7 minutes in the preheated oven, until medium brown. Cool completely before removing from the cookie sheets. In the microwave or in a metal bowl over a pan of simmering water, melt chocolate chips, stirring frequently until smooth. Remove from heat. Spread chocolate onto the bottoms of cookies and sandwich them together.

Sunday, March 25, 2012

Chocolate Fudge Balls


I made these fudge balls for a party at my school, and they were a huge hit!  I made half coated with coconut and the other half coated with powdered sugar (in case some people didn't like coconut...what freaks).  They are nice and sweet on the outside, and fudgey and chocolatey and slightly chewy and rich on the inside. The addition of melted bittersweet chocolate (i used Ghiradelli) and coffee powder makes the chocolate incredibly delicious. They literally melt in your mouth and you have to stop and treasure the moment when you pop them into your mouth.  I was skeptical before I made them because they use raw oats, and I thought it would give them a weird, chewy, texture...but the result was so amazing.  You don't taste the oats; they just hold the balls together and make them chewy like fudge. 


Ingredients:

  • 4 cups regular rolled oats
  • 1 cup white sugar
  • 2 tablespoons brown sugar
  • 1/2 cup unsweetened cocoa powder
  • 1 cup butter or margarine, softened
  • 2 tablespoons strong coffee
  • 1 teaspoon vanilla extract
  • 1/4 cup 60% bittersweet chocolate, melted
  • 1/2 cup coconut flakes or 1 cup powdered sugar

Directions:

  1. Mix the oats, sugar, and cocoa together in a bowl. Add the butter, and use your hands to mix the ingredients together to make a thick dough. Mix in the coffee, vanilla, and chocolate until thoroughly blended.
  2. Place the coconut flakes or powdered sugar in a small bowl. Pinch off small amounts of dough and roll between your hands to make small balls, about 1-1/2 inches in diameter. Roll the balls in the coconut flakes or powdered sugar. Balls are ready to eat, or may be refrigerated 2 hours to become firmer.