Showing posts with label whipped cream. Show all posts

Tuesday, June 19, 2012

Chocolate Cream Pie


Chocolate Pie

IMG 2352 1024x768 Chocolate Cream Pie

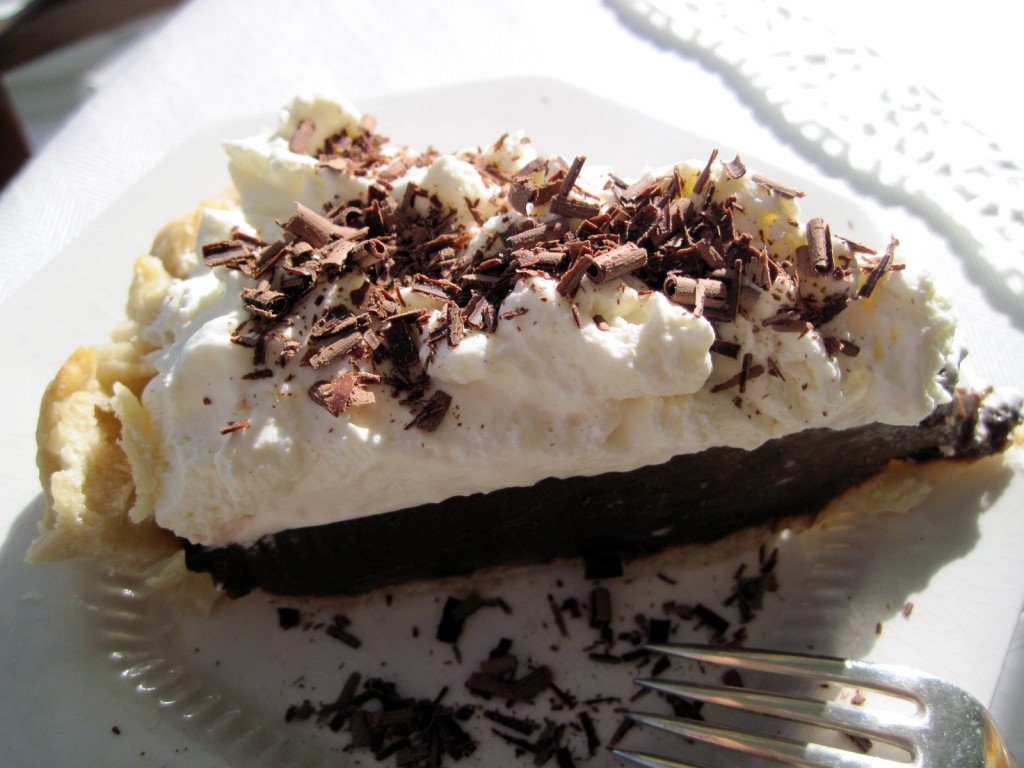
I'm drooling right now just looking back over these pictures.  I made my daddy a chocolate cream pie for Father's Day, and it was declared by him "the best pie he's ever had."  I couldn't believe how perfect it turned out.  It was so, so, so easy to make - yet tasted sinfully rich.  The crust is just a basic, flaky pie crust; I wouldn't use any other crust on this if you mainly want to taste the chocolate layer.  This layer is rich, fudgey, silky, and oh-so chocolatey.  It's also kind of thin, but you definitely won't mind because it's so rich anyways.  And even though it is very rich, it doesn't fill you up like a cheesecake would (since it's a thin layer) - so you will definitely want to go back for seconds(:  This pie was over half way eaten the first night I made it!  And that's just between my mom, dad and I, and it was right after we'd gone out for Father's Day dinner. This is definitely the only chocolate cream pie I will ever use from now on!

Yield: 1 9-inch pie

Ingredients:

  • 1 (9 inch) pie crust, baked
  • 1 1/4 cups white sugar
  • 2 tablespoons all-purpose flour
  • 2 tablespoons cornstarch
  • 1/4 teaspoon salt
  • 1 1/2 cups milk
  • 4 egg yolks
  • 2 (1 ounce) squares unsweetened chocolate
  • 1 tablespoon butter
  • 1 teaspoon vanilla extract

Thawed Cool Whip or home made whipped cream
Chocolate shavings, toasted coconut, or chopped candy bar pieces

Directions:

  1. In medium saucepan, combine sugar, flour, cornstarch and salt. In a medium bowl, beat milk and egg yolks until smooth. Gradually stir into sugar mixture. Stir constantly over medium heat until mixture thickens and comes to a full boil. Boil and stir for one minute.
  2. Remove from heat and stir in chocolate, butter and vanilla. Stir until melted.
  3. Pour into pie shell. Place plastic wrap over filling to prevent skin from forming and chill for several hours. Top with Cool Whip or whipped cream and toppings if desired.

Wednesday, May 9, 2012

Tres Leches Cake


Premium Tres Leches Cake

If you've never had Tres Leches Cake before, you HAVE to try it!  And if you've never even heard of it before, it's a common Mexican dessert and it's literally made with what the title is: three types of milk.  And of course, the three types of milk it uses are the sweet, fatty types.  The cake is chilled and soaks up all those delicious milks and creates a sweet, melt-in-your-mouth, refreshing dessert like no other. I had it for the first time at a Cuban restaurant and I fell in love with it.   I made it for a Spanish presentation a few days ago and everyone wanted the recipe.  I definitely want to make this for a party/celebration/holiday sometime soon because it's my new favorite cake.  I did use a box..which I usually never do because I'm a "scratch is best" girl, but since I had to make it for school and I had never made it before, I really didn't want to mess up.  It is semi-home made because of all the things you add to it, though(:

Ingredients:
1 box Betty Crocker® SuperMoist® yellow cake mix
1 1/4 cups water
1 tablespoon vegetable oil
2 teaspoons vanilla extract
4 eggs
1 can (15 oz)sweetened condensed milk (not evaporated)
1 cup evaporated milk or whole milk
1 cup whipping cream
1 tub of Cool Whip

Instructions:
1. Heat oven to 350°F (325°F for dark or nonstick pan). Grease and flour or spray bottom and sides of 13x9-inch pan.
2. In large bowl, beat cake mix, water, oil, vanilla and eggs with electric mixer on low speed 30 seconds, then on medium speed 2 minutes, scraping bowl occasionally. Pour into pan.
3. Bake as directed on box for 13x9-inch pan. Let stand 5 minutes. Poke top of hot cake every 1/2 inch with long-tined fork, wiping fork occasionally to reduce sticking.
4. In large bowl, stir together sweetened condensed milk, whole milk and whipping cream. Carefully pour evenly over top of cake. Cover; refrigerate about 1 hour or until mixture is absorbed into cake. Top with desired amount of Cool Whip. Store covered in refrigerator.
 

Friday, April 20, 2012

Strawberry Pavlova

I saw this recipe on Allrecipe.com a few weeks ago, and I had never had Pavlova before, so I figured: why not? I altered it a little bit based on what I had in my house, and it turned out soooo tasty!  And incredibly pretty! The perfect dessert on a hot, spring or summer day.  It's light, sweet, and very refreshing. What made this pavlova super amazing was the fact that the strawberries I used were freshly picked that same day.  A local strawberry patch is now open where I live, and my family picks strawberries every year.  Mmm...who doesn't love freshly picked, sweet strawberries with whipped cream?  This pavlova is simply a light, sweet, base for that.  Crunchy on the outside, and soft and fluffy on the inside.  The almond extract gives it a delicious flavor that pairs really well with the strawberries and whipped cream.  After a few days, the outside of this pavlova will get too soft, so eat it quickly!  I promise ---> it won't be difficult.

Yield: about 12 servings

Ingredients:

  • 4 egg whites
  • 1 1/4 cups sugar, divided
  • 2 pinches of flour, divided
  • 1 teaspoon lemon juice
  • 1/2 teaspoon almond extract
  • desired amount of Cool Whip, thawed
  • 1 quart fresh strawberries, sliced

Directions:

  1. Place egg whites in a large mixing bowl; let stand at room temperature for 30 minutes. Beat egg whites on medium speed until foamy. Add 1 pinch of flour; beat until soft peaks form. Gradually add 1-1/4 cups sugar, 1 tablespoon at a time, beating on high until stiff peaks form. Sprinkle pinch of flour over egg white mixture; fold in. Fold in lemon juice and extract.
  2. Coat a 14-in. pizza pan with nonstick cooking spray. Spoon meringue onto pan, forming any shape you want. Build up edges slightly. Bake at 250 degrees F for 45-55 minutes or until crisp. Cool on pan over a wire rack.
  3. When cool, spread with Cool Whip. Arrange strawberries over top. Serve immediately.

Saturday, February 18, 2012

Vanilla Pudding Pie in a Nilla Wafer Crust


A few days ago, I realized we had a bunch of Nilla Wafers in the pantry, and they were gonna expire soon, so I decided to use them up by making a crust for a pie out of them.  I absolutely love Nilla Wafers...they're one of my favorite snacks...especially in banana pudding.  So I knew that a crust would taste amazing made out of them.  We also had some vanilla pudding mix in the pantry, so I figured: Why not?  I made the pudding as directed, added some banana slices,  poured it into the pie crust, topped it with some whipped cream, and Wah-La!  I had created an incredibly easy, but oh-so-very-yummy pie.  I do have one confession: I do not think this is as quite as good as my banana cream pie (here), simply because the vanilla pudding in that recipe is home made, and I love that sugar cookie crust even more than this Nilla Wafer one.  But this recipe is much easier and quicker to make and I think the crust is very unique and a fantastic way to use up left over Nilla Wafers.  Even though it's not quite as good as my banana cream pie, it's still insanely good!!  I highly recommend both.


Ingredients:
1.5 cups nilla wafer crumbs (about 40 cookies)
2 tablespoons white sugar

1/3 cup unsalted butter, melted
4-5 medium bananas (optional)
1 package vanilla pudding mix
1 3/4 cup milk
1 tub cool whip, thawed
Garnish: banana slices, Nilla Wafer crumbs, Nilla wafer cookies (optional)


Instructions: 
1. preheat oven to 350 degrees.  Combine cookie crumbs, white sugar, and melted butter.  Pat into the bottom of a pie pan, and bake for 8-10 minutes, or until edges are very lightly browned.  Cool completely.
2.  Line cooled crust with banana slices - enough to completely cover the pie - if desired.  Beat pudding mix with milk for about 2-3 minutes, or until thick. Pour over cooled crust and/or banana slices.  Top with desired amount of thawed cool whip.  Refrigerate for at least 3 hours before serving.

Saturday, January 14, 2012

Chocolate Cream Pie Toast/Sandwich


Ahhh nutella....the world's most favorite spread....along with peanut butter, of course.  Did you know that there's a World Nutella Day?  Yep.  You can check out the website here.  There are sooo many amazing recipes all revolving around that one heavenly ingredient: NUTELLA. Whoever invented nutella was a genius.   I mean really, chocolate on bread?  Can it really be that easy and that delicious?  Ohh yesss..it most certainly can.  So I decided to enhance the usual nutella on toast to be a little more decadent: by adding whipped cream!  The whipped cream gets soft and slightly melted on top of the warm nutella and melts in your mouth.  I've had this toast many times...always with different toppings.  Feel free to add whatever toppings you'd like...crushed oreos, nilla wafers, or other crushed cookies, drizzle peanut butter, flaked coconut, caramel sauce, crushed candy bars, chocolate shavings....oh yeah, I've had it all.  Whatever way you choose to jazz it up, it will always be good.  And that's a promise.

Ingredients:
1 slice of bread, or 2 for a sandwich
1-2 tablespoons nutella (depending how much you want)
desired amount of whipped cream
desired toppings (see ones listed above, optional)

Instructions:
Toast bread.  Spread nutella immediatly over hot, toasted bread, until evenly coated.  Put whipped cream on top of nutella.  Add desired toppings, and enjoy(:

***you can add a slice of toasted bread on top to make a sandwich, too. And just a warning...the whipped cream tends to ooze out. But hey, it's the taste that counts, right? 

Saturday, January 7, 2012

Strawberry Cheesecake Toast/Sandwich


I had a blog-worthy idea the other day: dessert toast.  Genius, right?  Yeah, I know.  It's so easy and there is an incredible amount of options to choose from. And you can have it for dessert or breakfast...or even just a snack.   I got the idea from my delicious pumpkin pie toast found here.  I came up with this because we had some left over Cinnabon cream cheese frosting in the refrigerator (from cinnamon rolls on Christmas Eve morning...yum!), so I decided to use it up (usually I just slab it on graham crackers, but I decided to be more creative).  This  seriously tastes just like a cheesecake, but in toast form.  I let my dad have a bite, and the first thing he said was: "you have got to put this on your blog.  It's amazing."  So true.  It's very refreshing tasting.  Now that I think about it, It's like a cross between strawberry shortcake and cheesecake.  I realized after making this recipe that you can make sooo many variations of cheesecake toast: chocolate, cherry, peanut butter cup, caramel, apple...pretty much any type of cheesecake that you've ever heard of (think the Cheesecake Factory!) you can incorporate onto toast.  I'm definitely gonna post some more cheesecake toast recipes very soon(: So stay tuned.

Ingredients:
1 slice of bread
1/4 cup cream cheese frosting**** (more or less, depending on how you like it)
2 tablespoons graham cracker crumbs (again, more or less)
enough sliced strawberries to cover the top of your toast
whipped cream (optional)

****you can find a home-made cream cheese frosting recipe here.

Instructions:
1. Toast bread
2. Spread cream cheese frosting evenly over toasted bread.  Sprinkle graham cracker crumbs evenly over frosting.  Top with strawberries.
3.  Top desired amount of whipped cream over strawberries, if desired.

***you can add a slice of toast bread on top to make a sandwich, too.

Friday, January 6, 2012

Peanut Butter Pie


This may be my favorite pie ever.  Actually..yeah..it is my favorite pie ever.  Or maybe it's tied for first with my banana cream pie.  Whatever.  It's SO good!!! If you are a peanut butter addict - like me - then you will LOVE this pie!!! It's so dreamy, creamy and full of rich, peanut butter flavor.  It truly melts in your mouth and is totally irresistable.  It's incredibly easy to make too.  It reminds of of a cold peanut butter cup...but better...because it's in pie form. The texture is silky and fluffy - kind of like a lighter cheesecake.  I made this for a cross country party, but once I tasted it I didn't tell anyone about it because I wanted it all for myself.  I didn't have much luck though...once people started tasting it they couldn't stop!  It ended up being completely eaten and I wasn't able to take any more home.  But now it's a family favorite and I will continue making it often.

Ingredients:

For the Graham Cracker Crust:

  • 1 1/2 cups crushed graham crackers
  • 1/4 cup sugar
  • 1/3 cup butter, melted

For the Filling:
  • 4 ounces cream cheese
  • 3/4 cups confectioners' sugar
  • 1/2 cup smooth peanut butter
  • 1/2 cup milk
  • 8 ounces (half a tub) frozen whipped topping, thawed

Garnish (optional): Reese cups, more whipped cream, crushed oreos, chocolate syrup, and/or chocolate shavings

Directions:

For crust:
  1. In a small bowl, combine the crumbs and sugar; add butter and blend well. Press onto the bottom and up the sides of an ungreased 9-in. pie plate.
  2. Bake at 375 degrees F for 8-10 minutes or until crust is lightly browned. Cool on a wire rack before filling.

For Filling:

Directions:

  1. Beat together cream cheese and confectioners' sugar. Mix in peanut butter and milk. Beat until smooth. Fold in whipped topping.
  2. Spoon into cooled graham cracker crust; cover, and freeze until firm. Garnish if desired.

Monday, December 26, 2011

Chocolate Gingerbread Toffee Cake


Chocolate-Gingerbread-Toffee Cake Recipe


This may be the best cake I've ever had.  I made this for Christmas dessert yesterday, and it is absolutely outstanding. Oh..and just a warning: it makes a very large cake.  There's only 3 people in my family, and we've probably cut about 10 slices out of it, and there's still over half a cake left. I guess it's because it's 3 layers instead of the usual two. We even freezed some of it to save for the future, since we didn't want it to go bad. It took some time to prepare, but it was TOTALLY worth it...and lots of fun to make. This was on the cover of the December issue of Southern Living, and it was the winning recipe for the annual white cake recipe.  My cake did not turn out looking quite as perfect as the one on the magazine (be sure to refrigerate it after you fill the layers ASAP or else the melted ganache will pull the cake apart and may break some pieces...) - but hey, it's the taste that counts, right?  First, you start off by making 3 layers of gingerbread cake.  Melted chocolate chips, softened butter, sour cream, and hot water make it exceptionally moist.  And the molasses, spices, and vanilla give it a perfectly spiced flavor.  After the cakes have cooled, you make the silky ganache.  And this is what makes the cake so rich; it's mainly chocolate chips, butter, sweetened condensed milk, and heavy cream. Wow...now that sounds like a heart attack just waiting to happen.  But we're not even done yet.  As you slather the ganache between the cake layers,  you'll also sprinkle a generous amount of toffee bits on top. Pop it in the fridge for a few hours, and then spread on the "icing on the cake": the ginger whipped cream. I didn't think ginger would taste very good in whipped cream, but it's absolutely heavenly.  Especially since it uses fresh ginger (I'm not sure how dried ginger would have tasted, but I'm definitely sticking to fresh when I make this whipped cream). After all those hours preparing this cake, and when you finally take a bite, it will taste like "all the wonderful flavors that come tumbling from a stocking: milk chocolate santas, gingerbread men, and buttery toffee candy."


You can find this spectacular recipe here.

Banana Pancakes

Did you know that heavily speckled bananas have nearly three times the amount of fructose (the sweetest of the sugars in fruit) than less spotty bananas? Therefore, if you have a black banana, do NOT throw it away!! Bake with it!  Banana bread, banana muffins, banana cake, or my personal favorite...banana pancakes!  The riper the banana, the better the dish will taste.  And these banana pancakes taste very good.  They are delicious and nutritious...with hardly any fat (that is, unless you decide to slather them in butter, peanut butter, or whipped cream).  They fluff up beautifully and have the most perfect pancake texture.  I would highly recommend eating them with whipped cream, a sprinkle of cinnamon, and pure maple syrup because they don't take away from the wonderful banana flavor - like peanut butter or nutella or chocolate chips would (and that's saying a lot, because trust me:peanut butter and chocolate are my 2 favorite foods in the universe).  Not that you shouldn't add these toppings...because you totally could, but I liked maple syrup, cinnamon, and whipped cream the best. 

Yield: about 12 pancakes

Ingredients

  • 1 cup all-purpose flour
  • 1 tablespoon white sugar
  • 2 teaspoons baking powder
  • 1/4 teaspoon salt
  • 1 egg, beaten
  • 1 cup milk
  • 2 tablespoons applesauce
  • 1/2 teaspoon vanilla extract
  • 2 ripe bananas, mashed

Garnish: maple syrup, cinnamon, and whipped cream (optional)

Directions

  1. Combine flour, white sugar, baking powder and salt. In a separate bowl, mix together egg, milk, applesauce, vanilla extract, and bananas.
  2. Stir flour mixture into banana mixture; batter will be slightly lumpy.
  3. Heat a lightly oiled griddle or frying pan over medium high heat. Pour or scoop the batter onto the griddle, using approximately 1/4 cup for each pancake. Cook until pancakes are golden brown on both sides; serve hot.  Garnish with whipped cream, maple syrup, and a sprinkle of cinnamon if desired.

Wednesday, November 30, 2011

Pumpkin Pie Toast/Sandwich


One thing that I have always loved and always will love is incorporating dessert for breakfast.  Since I have an incredibly large sweet tooth, dessert is a meal that I can never have too much of.  I've realized that you can transform almost every single dessert into oatmeal, pancakes, french toast, waffles, or simply just toast.  Thanksgiving was a few days ago, so I was thinking about all the desserts I had, like my delicious pumpkin pecan praline cheesecake, which was made with William Sonoma's pumpkin butter.  And I had an idea: pumpkin pie...on toast.  So simple, yet so delicious.  And way healthier than the traditional pumpkin pie.  If you've never had pumpkin butter, it tastes just like pumpkin pie filling, but it's all natural and doesn't use evaporated milk.  So I spread a little bit on toast, added some whipped cream, topped it with graham cracker crumbs, and wa-lah! Pumpkin pie toast.  It was like eating pumpkin pie for breakfast.  Yum.

Ingredients:
1 slice bread (I used whole wheat)
2 tablespoons pumpkin butter*
whipped cream
graham cracker crumbs


Instructions:
Toast bread.  Spread pumpkin butter over toasted bread.  Spread enough whipped cream on top of the pumpkin butter so it's completely covered.  Sprinkle top of whipped cream with generous amount of graham cracker crumbs.


*If you don't have pumpkin butter, then you can make your own.  Combine canned pumpkin with a sprinkle of sugar (white or brown is fine), and a dash of pumpkin pie spice.


***you can also add a slice of toasted bread on top to make a sandwich.