Showing posts with label cream cheese. Show all posts

Sunday, July 14, 2013

Chocolate Chip Cookie Dough Cheesecake Bars


First off, I sincerely apologize for not blogging in such a long time. The end of my junior year in high school was...well - INSANE. But now it's summer! And all my hard work was totally worth it. Now I am officially a senior! 

You wanna know what I'm pumped about the most for this summer? BAKING! So my first post of the summer is this absolutely incredible recipe for cookie dough cheesecake bars. Oh my goodness, are they something magical. These scrumptious treats are the perfect combination of cheesecake and chocolate chip cookie dough. Can you even think of a more amazing pairing? I sure can't. I brought a full pan of these to a cross country party and they literally vanished before I could even blink. I guess you could say my parents were more than a little disappointed that I came home with an empty tray...

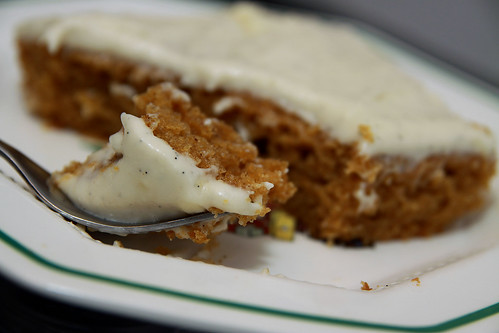
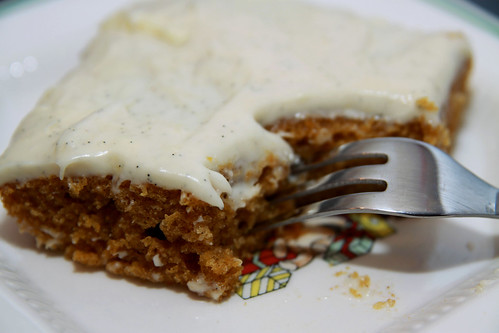
The recipe begins with a fool-proof, classic graham cracker crust. Above the crust lies another perfect, creamy layer of luscious cheesecake, wonderfully vanilla-y and delicious. Last but not least, my personal favorite layer is at the top: the cookie dough. Ahh cookie dough....my love...buttery and brown-sugary and studded with chocolate chips....can you say YUM??? This cookie dough is egg-less, so it's safe to eat (yes, by the spoonful if you wish). Together, the three layers form this heavenly dessert that you won't be able to resist.


Yield: about 12 bars

Ingredients:
Crust
1 1/2 cups graham cracker crumbs
1 teaspoon ground cinnamon
5 tablespoons unsalted butter, melted


Cookie Dough
5 tablespoons unsalted butter, room temperature
1/3 cup packed light brown sugar
3 tablespoons granulated sugar
1/4 teaspoon salt
1 teaspoon pure vanilla extract
1/2 cup all-purpose flour
3/4 cup chocolate chips


Cheesecake Filling
10 ounces cream cheese, at room temperature
1/4 cup granulated sugar
1 large egg, at room temperature
1 teaspoon vanilla extract

Instructions:
1. Preheat the oven to 325 F. Line an 8 inch square baking pan with parchment paper or foil allowing a little overhang and spray with nonstick cooking spray. Set aside.
2. Mix the melted butter, cinnamon, and graham cracker crumbs until thoroughly combined. Press the mixture into the bottom of the prepared pan. Bake in preheated oven for 6 minutes. Remove pan to a cooling rack. Leave your oven on while you prepare the dough.
3. While the crust is cooling, prepare the chocolate chip cookie dough. In the bowl of a stand mixer fitted with the paddle attachment or in a large bowl with an electric mixer, beat butter, brown sugar, granulated sugar, salt and vanilla until smooth and thoroughly combined, about 1 minute. Mix in the flour on low speed, and mix until just incorporated. Mix in the chocolate chips. Set aside. (Note: if the cookie dough looks a little dry, it's fine. It will be crumbled on top of the cheesecake layer.)
4. In the bowl of a stand mixer fitted with the paddle attachment or in a large bowl with an electric mixer cream together the cream cheese and sugar until smooth. Mix in the egg and vanilla on low speed just until incorporated. Pour the cheesecake batter into the prepared crust. Use your hands to form "clumps" of the cookie dough, smoosh it together and flatten it out.  Distribute the cookie dough onto the top of the cheesecake batter in teaspoon-sized clumps. Be sure to use all of the dough.
5. Bake for about 30 minutes, until the top feels dry and firm (the cookie dough) and the entire pan looks set if given a gentle shake. Move bars to a cooling rack and allow to cool completely. Chill in refrigerator overnight or for at least a couple hours.
6. Lift the bars out by the overhang and cut into squares for serving.

**Note: these taste best at room temperature.


Thursday, March 28, 2013

Italian Cream Pancakes

Italian Cream Pancakes Recipe


I know I haven't posted in a while...I've been super busy with school work (junior year is killing me), but now it's FINALLY time for Spring Break! I will try my best to post at least one recipe each day because there are so many recipes I've been meaning to post and I know I am super behind. For my first post in a while, I have decided to present to you these incredible, sweet, nutty pancakes topped with a decadent cream cheese glaze. 

Yes, they are just as delicious as they sound. I promise.

If you've never tasted Italian Cream Cake, then you totally need to. Like...immediately. Sooo..you can start with this breakfast recipe! These pancakes seriously taste just like Italian Cream Cake, only hot and in heavenly pancake form, with warm glaze oozing all over them. Coconut, cream cheese frosting, and pecans are the most perfect combination perhaps in the entire world, and they taste scrumptious in this recipe.  Not to mention, toasting ] the pecans give the pancakes a wonderful nutty-ness that tastes so warm and comforting.

There were no leftovers when I made these for my family, and I'm sure the same thing will happen for you.

You can find this decadent recipe here. 

Friday, November 9, 2012

Sweet Potato Cake with Cream Cheese Frosting


pumpkin pie fork

Woah now.  Sweet potato cake?  There's sweet potato pie...and pumpkin cake...and potato bread...and sweet potato casserole...but sweet potato cake?  Yeah okay so it sounds a little strange at first, but it's really not all that weird when you think about it.  Sweet potatoes are super similar to pumpkin, and there's pumpkin cake, so why not have a sweet potato cake?  At least this is what I was thinking before I made this magnificently scrumptious masterpiece.  I brought this to school for a party, and all my friends - and the teachers - raved about it. It is SO amazing.  The secret ingredient in this recipe is the beer.  I don't know the scientific reason for it, but beer makes baked goods so incredibly moist and have the softest texture.  Oh and I haven't even started on this cream cheese frosting.  It's like heaven in your mouth.  Beating it for 3 minutes makes it fluffy and it melts in your mouth.  And the cinnamon flavor mixed with the sweet potato flavor makes the whole dish just scream fall.  And with fall comes Thanksgiving(:  This cake may just be on our Thanksgiving table this year...

Yield: 1 9x13 inch pan

Ingredients
1 cup white sugar
3/4 cup lightly packed brown sugar
3/4 cup vegetable oil
3 eggs
1 teaspoon vanilla extract
2 cups cooked, mashed sweet potatoes
2 cups all-purpose flour
3 teaspoons baking powder
2 teaspoons baking soda
1/4 teaspoon salt
1 tablespoon ground cinnamon
1 pinch of nutmeg

Directions
1.Preheat the oven to 350 degrees F (175 degrees C). Grease and flour a 9×13 inch baking dish.
2.Stir together the sugar and vegetable oil in a large bowl until smooth. Beat in the eggs one at a time, then stir in the vanilla and sweet potatoes. Combine the flour, baking powder, baking soda, salt, nutmeg and cinnamon in a separate bowl; stir into the batter 1 cup at a time, alternating with the beer just until everything comes together. Spread the batter evenly in the prepared pan.
3.Bake for 30-35 minutes in the preheated oven, or until a knife inserted into the center of the cake comes out clean. Cool completely before frosting (optional) or serving.

Melt-In-Your-Mouth Cream Cheese Frosting: 
  • 1/2 cup of butter (1 stick), room temperature
  • 8 oz of Philly cream cheese (1 package), room temperature
  • 2 - 3 cups of powdered sugar
  • 1 teaspoon of vanilla extract

Instructions

1 With an electric mixer, mix the butter and cream cheese together, about 3 minutes on medium speed until very smooth. Scrape down the sides and bottom of the bowl to ensure even mixing.
2 Add the vanilla extract and mix. Slowly add the powdered sugar. Keep adding until you get to desired sweetness and thickness.

Sunday, July 22, 2012

Steak Stroganoff


This was my very first time ever eating Stroganoff.  It was also my dad's first time, and he is seriously raving about it as I type this right now.  My mom had Beef Stroganoff a few times growing up, but she said it was disgusting compared to this delicious recipe I cooked.  Some people would call this "Beef" Stroganoff, but that seems to me more of a Hamburger Helper type dish with ground beef and ketchup (kind of like a Sloppy Joe taste). This dish uses sirloin steak, so I'm calling it Steak Stroganoff.  The thing that makes this more unique than other Stroganoff recipes is the fact that this slow cooks for an hour, so the simmering blends all the flavors together and the meat gets super tender.  The tender meat is then mixed with a mushroom cream sauce.  I love the cream sauce because it's unlike any cream sauce I've ever had.  It's not like a rich, Alfredo sauce with heavy cream.  It's lighter, but still creamy and comforting, and uses sour cream and cream cheese.  The tartness of the sour cream balances with the sweet, red wine, and the mustard and Worcestershire sauce adds even more depth to the dish.  I served this with a side of steamed broccoli, but I recommend serving it with some french bread or garlic bread as well to soak up all the creamy sauce.  The result is a comforting, yet hearty meal that everyone will love.


Ingredients:

  • 2 pounds beef tenderloin or top sirloin, cut into 1/4 inch thick by 2 inches long strips 
  • 1/2 cup red wine, preferably Burgundy or Pinot Noir
  • 1/2 teaspoon salt
  • 1/2 teaspoon ground black pepper
  • 4 tablespoons butter
  • 1 medium white onion, chopped
  • 4 tablespoons corn starch
  • 1 1/4 cup beef stock
  • 1 tablespoon prepared mustard
  • 1 tablespoon Worcestershire Sauce
  • 8 ounces sliced mushrooms, separated into 2 4-ounce piles
  • 1/3 cup sour cream
  • 1/3 cup cream cheese, softened
  • salt to taste
  • ground black pepper to taste

For the noodles:
1 lb egg noodles
1 tablespoon butter

Garnish:
Sliced scallions and freshly grated Parmesan cheese

Directions:

  1. Season steak with 1/2 teaspoon of both salt and pepper, place in a large sealable bag and pour 1/2 cup red wine over the meat.  Shake to fully coat, and marinate in the refrigerator for 1 to 2 hours.
  2. In a large skillet over medium heat, melt the butter and pour in the beef strips along with the wine juices in the bag. Brown the beef strips, then push the beef strips off to one side. Add the onions and half of the sliced mushrooms (4-oz) into the wine/butter mixture and cook slowly for 3 to 5 minutes, then push to the side with the beef strips.
  3. Stir the cornstarch into the juices on the empty side of the pan (onions, mushrooms, and steak pieces will probably get into this puddle of juices, which is fine, it's just to give you more room to work with without a bunch of food getting in the way). Pour in beef broth and bring to a boil, stirring constantly. Lower the heat and stir in mustard and Worcestershire sauce. Cover and simmer for 1 hour or until the meat is tender.
  4. Five minutes before serving, stir in the other 4 ounces of mushrooms, sour cream, and cream cheese. Heat briefly and then salt and pepper to taste.
  5. Serve with buttered egg noodles (below) and serve (also below).

For Noodles:
Bring a large saucepan of salted water to a boil. Add the noodles to the pan of boiling water and cook at a low boil until al dente, about 10 minutes. Drain, then toss the noodles with the butter to coat.

To serve:
Arrange the buttered noodles on warm serving plates and top with the stroganoff. Garnish with desired amount of sliced scallions and freshly grated Parmesan cheese, and serve immediately.

Thursday, July 19, 2012

Red Velvet Cookies


I was looking for a way to use up some cream cheese in my fridge, and I stumbled upon a red velvet cookie recipe in my recipe box.  It was love at first sight.  Who can resist a fluffy, chocolatey, moist red velvet cake cookie? The consistency of the "cookie" is the perfect balance of red velvet cake moist-ness but the thicker texture of a soft cookie. The cookie itself is amazing, but it's not a true "Red Velvet Cookie" without the cream cheese frosting (it would simply be a red, fluffy, chocolate cookie).  This frosting is what really makes these cookies out of this world.  Maybe I just hadn't had cream cheese frosting in a while, but it's absolutely divine.  I'm not even embarrassed to say that I was eating it by the spoonful.  I like my cream cheese frosting not very thick - more like a glaze -, so that you can taste more cream cheesey-ness than powdered sugar.  If you like frosting really thick and stiff with powdered sugar, then feel free to add as much as you want...I just prefer less.  Anyways...back to the cookies.   They are seriously everything you love about red velvet cake, but in cookie form.  Hold up - I take that back, because I've never had a slice of red velvet cake that's nearly as delicious as these cookies.  I had some warm from the oven with the cream cheese frosting oozing off, and also at room temperature the following day (the cream cheese frosting firms up perfectly the next day).  Both incredible...heavenly...to-die-for delicious.  My dad nearly fell to the ground on his first bite.

Yield: about 36 small cookies
  

Ingredients:

  • 2 cups all-purpose flour
  • 1/2 teaspoon baking soda
  • 1/2 teaspoon salt
  • 2 (1 ounce) squares unsweetened baking chocolate, broken into pieces
  • 1/2 cup unsalted butter, softened
  • 2/3 cup brown sugar, firmly packed
  • 1/3 cup white sugar
  • 1 large egg
  • 1 tablespoon red food coloring
  • 3/4 cup sour cream
  • 1 cup chocolate chips (I used semisweet, but other flavors are fine)
  •  
  • Cream Cheese Frosting
  • 1/4 cup unsalted butter, softened
  • 4 ounces cream cheese, at room temperature
  • 1/2 teaspoon vanilla extract
  • 2 cups confectioners' sugar, sifted, or as needed

Directions:

  1. Preheat oven to 375 degrees F (190 degrees C) with the rack in the middle position. Grease baking sheets or line with parchment paper. Sift together the flour, baking soda, and salt.
  2. Break the chocolate squares into chunks, place in a microwave-safe bowl and microwave on High until the chocolate melts, about 90 seconds. Stir the chocolate until smooth and set aside to cool.
  3. In a large bowl, beat 1/2 cup butter, brown sugar, and white sugar until light and fluffy; pour in the egg and beat until smooth. Mix in the red food coloring and chocolate, scraping the bowl down regularly, until evenly blended, about 30 seconds. Add half of the sifted dry ingredients, stirring until well incorporated. Beat in the sour cream and mix in the remaining dry ingredients. Fold in the chocolate chips. Drop spoonfuls of the dough 2 inches apart onto prepared baking sheets.
  4. Bake one sheet at a time in the preheated oven until they spring back when pressed and a toothpick inserted in the center comes out almost completely clean, about 9 minutes. Cool in the pans for 5 minutes before removing to cool completely on a wire rack.
  5. For the cream cheese frosting, whip 1/4 cup unsalted butter, cream cheese, and vanilla until smooth. Blend in the powdered sugar in half cup portions until the frosting reaches the desired consistency.  If you want to eat the cookies when cooled, then wait to frost them until the cookie has completely cooled.  If you just can't resist waiting for them to cool and decide to eat them when warm (which I highly recommend because the chocolate chips are all melty and delicious), then slather the cream cheese frosting on them and dig in(:  Just a warning: the cream cheese frosting may ooze a bit on the warm cookies, but that just makes them so much more irresistible.

***you can also make a cookie sandwich with them if you want.

Wednesday, July 11, 2012

Creamiest Mashed Potatoes


I'm gonna be honest...I'm not a mashed potato fan.  They just taste so plain and boring! Even on Thanksgiving, mashed potatoes have never been on my plate.  They are absolutely tasteless to me.  That is....until I created this recipe.  Garlic mashed potatoes, as opposed to plain mashed potatoes, I like a little bit more since there's more flavor, so I decided to perk up your normal mashed potato recipe into the ultimate garlic mashed potato recipe.  Now these potatoes have the perfect amount of garlicy flavor, and are incredibly creamy.  Sour cream, cream cheese, and butter make these {melt in your mouth}.  Another thing that's unique about this recipe is that the potatoes are made in the slow cooker for a few hours.  This allows all the flavors to blend together, and the result is phenomenal.  It also allows the potatoes to stay warm throughout your whole meal, even when you go back for seconds...and thirds(;  One thing I think is essential to mashed potatoes is SALT.  Add lots and lots of salt! It brings out all the flavors and makes them taste ten times better. I recommend using garlic salt if you're a garlic fan for the best flavor.  Make sure to blend the butter in at the very end; this makes the potatoes richer when served because the "buttery" flavor is a little more pronounced.  Adding the same salty, garlicy water to the potatoes that they were boiled in also adds a flavor boost.  I made these as a side dish to steak and salad, and the potatoes tasted heavenly mixed with the steak.  My parents and I all agree that these are the best mashed potatoes we've ever had.  My mom nearly fell to her knees on her first bite.  These will definitely be on my Thanksgiving plate this year!

Yield: about 10 servings

Ingredients:

  • 5 pounds red potatoes, cut into chunks
  • 2 tablespoons minced garlic
  • 3 cubes chicken bouillon
  • 1 (8 ounce) container sour cream
  • 1 (8 ounce) package cream cheese, softened
  • 1/2 cup butter, softened
  • garlic salt, salt and pepper to taste

Directions:

  1. In a large pot of lightly salted boiling water, cook the potatoes, garlic, and bouillon until potatoes are tender but firm, about 15-18 minutes. Drain, reserving water. In a bowl, mash potatoes with sour cream and cream cheese, adding reserved water as needed to attain desired consistency.
  2. Transfer the potato mixture to a slow cooker, cover, and cook on low for 2 to 3 hours, stirring every hour to prevent sides from sticking. Just before serving, stir in butter and season with garlic salt, salt and pepper to taste.


Friday, June 22, 2012

Fudge Truffle Chocolate Cheesecake

cheesecake-top


This cheesecake is absolutely perfect in every way.  I made this for my mom a few days ago for her birthday, and I couldn't believe how well everything went to prepare it.  I had a chocolate cheesecake recipe saved in my recipe box, and I altered it to make it extra delicious (I don't reveal my secret ways, though!) and it turned out phenomenal.  There's a thin, sweet, slightly crunchy, vanilla-chocolate cookie layer on the bottom....a rich, soft, silky, smooth, cream-cheesy, fluffy, milk chocolatey layer in the middle....and a thin, super rich, dark chocolatey, fudgey ganache layer on top.  It just gets richer and more chocolatey as you work your way up the layers of the cake.   The only thing that was kind of annoying about this recipe is the crust is super messy to make because you have to mix the ingredients by hand...but it comes off your fingers easily (and you can lick them when you're done pressing it into the pan!) and is totally worth the effort.  This was the second cheesecake I've ever made that didn't crack (behind my incredible strawberry cheesecake recipe found here).  Even if your cheesecake does crack, you can always cover it with the oh-so-rich-and-delicious chocolate ganache.  The three wonderful layers of this cheesecake really make it seem as though you're biting into a chocolate truffle...but I'd rather have this cheesecake over a chocolate truffle any day.  Serve each slice with a dollop of whipped cream and you'll never order a chocolate cheesecake at the Cheesecake Factory ever again. (Because this recipe is sooo much better!!!)

Yield: 1 9-inch springform pan (about 14 servings)
Ingredients:
  • 1 1/2 cups Nilla wafer crumbs
  • 1/2 cup confectioners' sugar
  • 1/3 cup unsweetened cocoa powder
  • 1/3 cup butter, softened
  • 2 cups semi-sweet chocolate chips
  • 3 (8 ounce) packages cream cheese, softened 
  • 1 (14 ounce) can sweetened condensed milk, at room temperature
  • 4 eggs, at room temperature
  • 2 teaspoons vanilla extract
Directions:
  1. Preheat oven to 300 degrees F (150 degrees C).
  2. In a large mixing bowl, mix together crushed vanilla wafers, confectioners' sugar, cocoa, and butter or margarine by hand. Press ingredients into a 9 inch springform pan (a 10-inch will work also).
  3. In the top of a double boiler, melt the chocolate chips, making sure that they are very smooth.
  4. In a large bowl, beat cream cheese until fluffy with an electric mixer. Gradually beat in condensed milk until smooth. Mix in melted chocolate, eggs, and vanilla. Beat with electric mixer on low speed until the ingredients are thoroughly blended. Pour the filling into the prepared crust.
  5. Bake at 300 degrees F (150 degrees C) for 55 minutes.  The cake will seem underbaked in the center, but will continue to cook after you turn the oven off.  Turn the oven off and leave the cake in the oven, with the oven door slightly cracked, for at least one hour (this prevents the cake from cracking).  Carefully remove the cake from the oven and allow it to cool in the refrigerator for at least 3 hours (or preferably overnight) before topping with the chocolate ganache. 


For the Chocolate Ganache:

Ingredients:

  • 4.5 ounces bittersweet chocolate, chopped
  • 1/2 cup heavy cream

Directions:

  1. Place the chocolate into a medium bowl. Heat the cream in a small sauce pan over medium heat. Bring just to a boil, watching very carefully because if it boils for a few seconds, it will boil out of the pot. When the cream has come to a boil, pour over the chopped chocolate, and whisk until smooth.
  2. Allow the ganache to cool slightly before pouring over a cake (about one minute). Start at the center of the cake and work outward. Spread a thin layer all over the top of the cake, spreading just over the sides.  Refrigerate for at least 30 minutes before serving.

Tuesday, June 5, 2012

Baked Toffee Apple French Toast


The flavors of this dish were so unique!  Who knew that apples, cream cheese, vanilla, chocolate, and toffee would all taste so delicious together??  I found this recipe at Betterrecipes.com, but I modified it a little to make it better (candy bar used, type of milk, type of apples, and bread cube size).  I was really skeptical before making it because there were no reviews and I had no idea if I was going to like apples and cream cheese and chocolate mixed together, but I definitely did!  The flavors blend perfectly together, and there's just the right amount of each ingredient.  The richness of the cream cheese and vanilla, combined with the slight tartness of the apples, with a slight burst of chocolate toffee was so amazing...and smells heavenly while baking.  The inside is super moist and comforting, and the very top is wonderfully crunchy.  The only change I may make next time I make it is to add a cinnamon brown sugar topping because some of the bread cubes sticking up at the top would have been really tasty with a sweet, crunchy, topping.  But it totally isn't necessary.  I would also love to try this with white chocolate chips instead of the heath bar..or just adding white chocolate chips to the heath bar.  I highly recommend serving this warm with whipped cream, and it's also very tasty chilled after sitting in the refrigerator.


Ingredients:
8 cupsCubed or torn French Bread, about 1" cubes
2Medium apples, peeled and chopped
1 pkg(8 Ounces) Cream Cheese, softened
¾ cupPacked Brown Sugar
¼ cupWhite Sugar
1¾ cupsWhole Milk
2 tspVanilla Extract, divided
½ cupEnglish Toffee Bits (such as Heath Bar)
5Eggs
DIRECTIONS:
Place half of the bread cubes in a greased 13-in. x 9-in. baking dish; top with apples. In a large bowl, beat the cream cheese, sugars, 1/4 cup milk and 1 teaspoon vanilla until smooth; stir in toffee bits. Spread over apples. Top with remaining bread cubes.
In another bowl, beat the eggs and remaining milk and vanilla until blended; pour over bread. Cover and refrigerate overnight.
Remove from the refrigerator 30 minutes before baking. Bake, uncovered, at 350F for 35-45 minutes or until a knife inserted near the center comes out clean.

Saturday, May 19, 2012

Banana Cake with Cream Cheese Frosting


Do those pictures look yummy or what?  Well, the pictures are nothing compared to the taste of this heavenly banana cake.  My friend and I made this a few days ago for a party at school, and it turned out fabulous!  A ton of people tried it, and everyone was "mmmm"ing like crazy and telling me how delicious it was.  I had never made banana cake before - just banana bread - but I'm definitely gonna make it again soon.  This cake was unique because it was cooked at a very low temperature of 275 degrees (as opposed to the usual 350) and then after it was cooked, it was immediately put into --- get this --- the freezer.  Weird, right?? The reason for this is so that the cake cooks evenly in the oven, with a soft outer crust and tender interior. Also, to prevent it from cooking any more when you pull it out, it's put directly into the freezer...making the result extremely soft, fluffy, and incredibly moist.  Putting it in the freezer also allowed it to be frosted and ready to be eaten in no time;  My friend and I were eating our first slice just two hours after stepping into the kitchen. And it looked absolutely beautiful with the cream cheese frosting and a sprinkle of chopped nuts!  Perfect for any occasion.  I can't wait to make more banana cakes in the future.  With this perfect cake base, the flavors you could combine with it are endless...chocolate chip, peanut butter, nutella, peanut butter and nutella, chocolate marble, peanut butter chip, butterscotch chips, white chocolate chip, caramel/praline, strawberry, coconut...I could go on forever.  Try this recipe...you won't be disappointed.

Ingredients:

  • 3/4 cup butter
  • 2 1/8 cups white sugar
  • 3 eggs
  • 2 teaspoons vanilla extract
  • 3 cups all-purpose flour
  • 1 1/2 teaspoons baking soda
  • 1/4 teaspoon salt
  • 1 1/2 cups buttermilk
  • 2 teaspoons lemon juice
  • 1 1/2 cups mashed bananas (about 4 medium)
  •  
  • 1/2 cup butter, softened
  • 1 (8 ounce) package cream cheese, softened
  • 3 1/2 cups confectioners' sugar
  • 1 teaspoon vanilla extract
  • Chopped nuts (optional)

Directions:

  1. Preheat oven to 275 degrees F (135 degrees C). Grease a 9x13 inch pan. In a small bowl, mix mashed bananas with lemon juice, set aside. In a medium bowl, mix flour, baking soda and salt. Set aside.
  2. In a large bowl, cream 3/4 cup butter and 2 1/8 cups sugar until light and fluffy. Beat in the eggs one at a time, then stir in 2 teaspoons vanilla. Beat in the flour mixture alternately with the buttermilk. Stir in banana mixture. Pour batter into prepared pan.
  3. Bake in preheated oven for 1 hour, or until a toothpick inserted into the center of the cake comes out clean. Remove from oven and place directly into freezer for 45 minutes. This will make the cake very moist.
  4. For the frosting: In a large bowl, cream 1/2 cup butter and cream cheese until smooth. Beat in 1 teaspoon vanilla. Add confectioners sugar and beat on low speed until combined, then on high until frosting is smooth. Spread on cooled cake.  Sprinkle with chopped nuts if desired.