Friday, June 29, 2012

Carrot-Oat Cake Bars


Who doesn't love a yummy, healthy snack?  This recipe was originally submitted from Whole Foods (best grocery store ever!!) and I figured I would try it out because I had been wanting to make a healthy recipe, since my family and I have had a little too many unhealthy things lately. (especially sweets....shocker, right?).  I love the hearty texture of this cake/bar.  It kind of reminds me of the Carrot Cake Lara Bar...only my recipe is wayyyy better.  The only fat in it is the coconut and nuts (which are healthy fats!), and a tiny bit of butter in the powdered sugar frosting - if you choose to use it. Everything else is made with extremely healthy ingredients!  This can be served for breakfast, dessert, or simply an anytime snack.  I had it warm for dessert with a powdered sugar frosting from my heavenly spice cake bars (found here) and at room temperature the next morning for breakfast with my healthy, yogurt glaze from my incredible, healthy carrot cake recipe (found here).  These bars only lasted a few hours in my house!  They are so perfect for on-the-go snacking as well!

Ingredients:


1 cup raisins
orange juice - enough to completely cover the raisins
Cooking spray 
1 cup rolled or quick cooking oats 
1 cup chopped nuts (I used almonds)
1 cup whole wheat flour 
2 teaspoons baking powder 
1 teaspoon baking soda 
1 teaspoon ground cinnamon 
1/2 teaspoon ground ginger 
1/2 teaspoon salt 
2 cups grated carrots 
1/2 cup pure maple syrup 
2 tablespoons honey
2 tablespoons unsweetened applesauce
1/2 cup sweetened finely shredded coconut 
1 1/2 teaspoons vanilla extract

Instructions:

Preheat oven to 325°F. Lightly oil a (9-inch) square baking pan with cooking spray and set it aside. 


Cover raisins with orange juice in a small sauce pan and bring to a boil, simmer for about 20 minutes, or until big and plump.  Drain and cool.


Pulse oats and nuts in a food processor until coarsely ground. Transfer to a large bowl. Add flour, baking powder, baking soda, cinnamon, ginger and salt and mix well. In a second large bowl, combine carrots, maple syrup, honey, applesauce, drained raisins, coconut and vanilla. Add carrot mixture to flour mixture and stir until completely incorporated. Transfer to prepared pan and bake until cooked through and deep golden brown, about 40 -60 minutes.  Set aside to let cool before cutting into squares.  Serve warm or at room temperature.  Frost if desired.


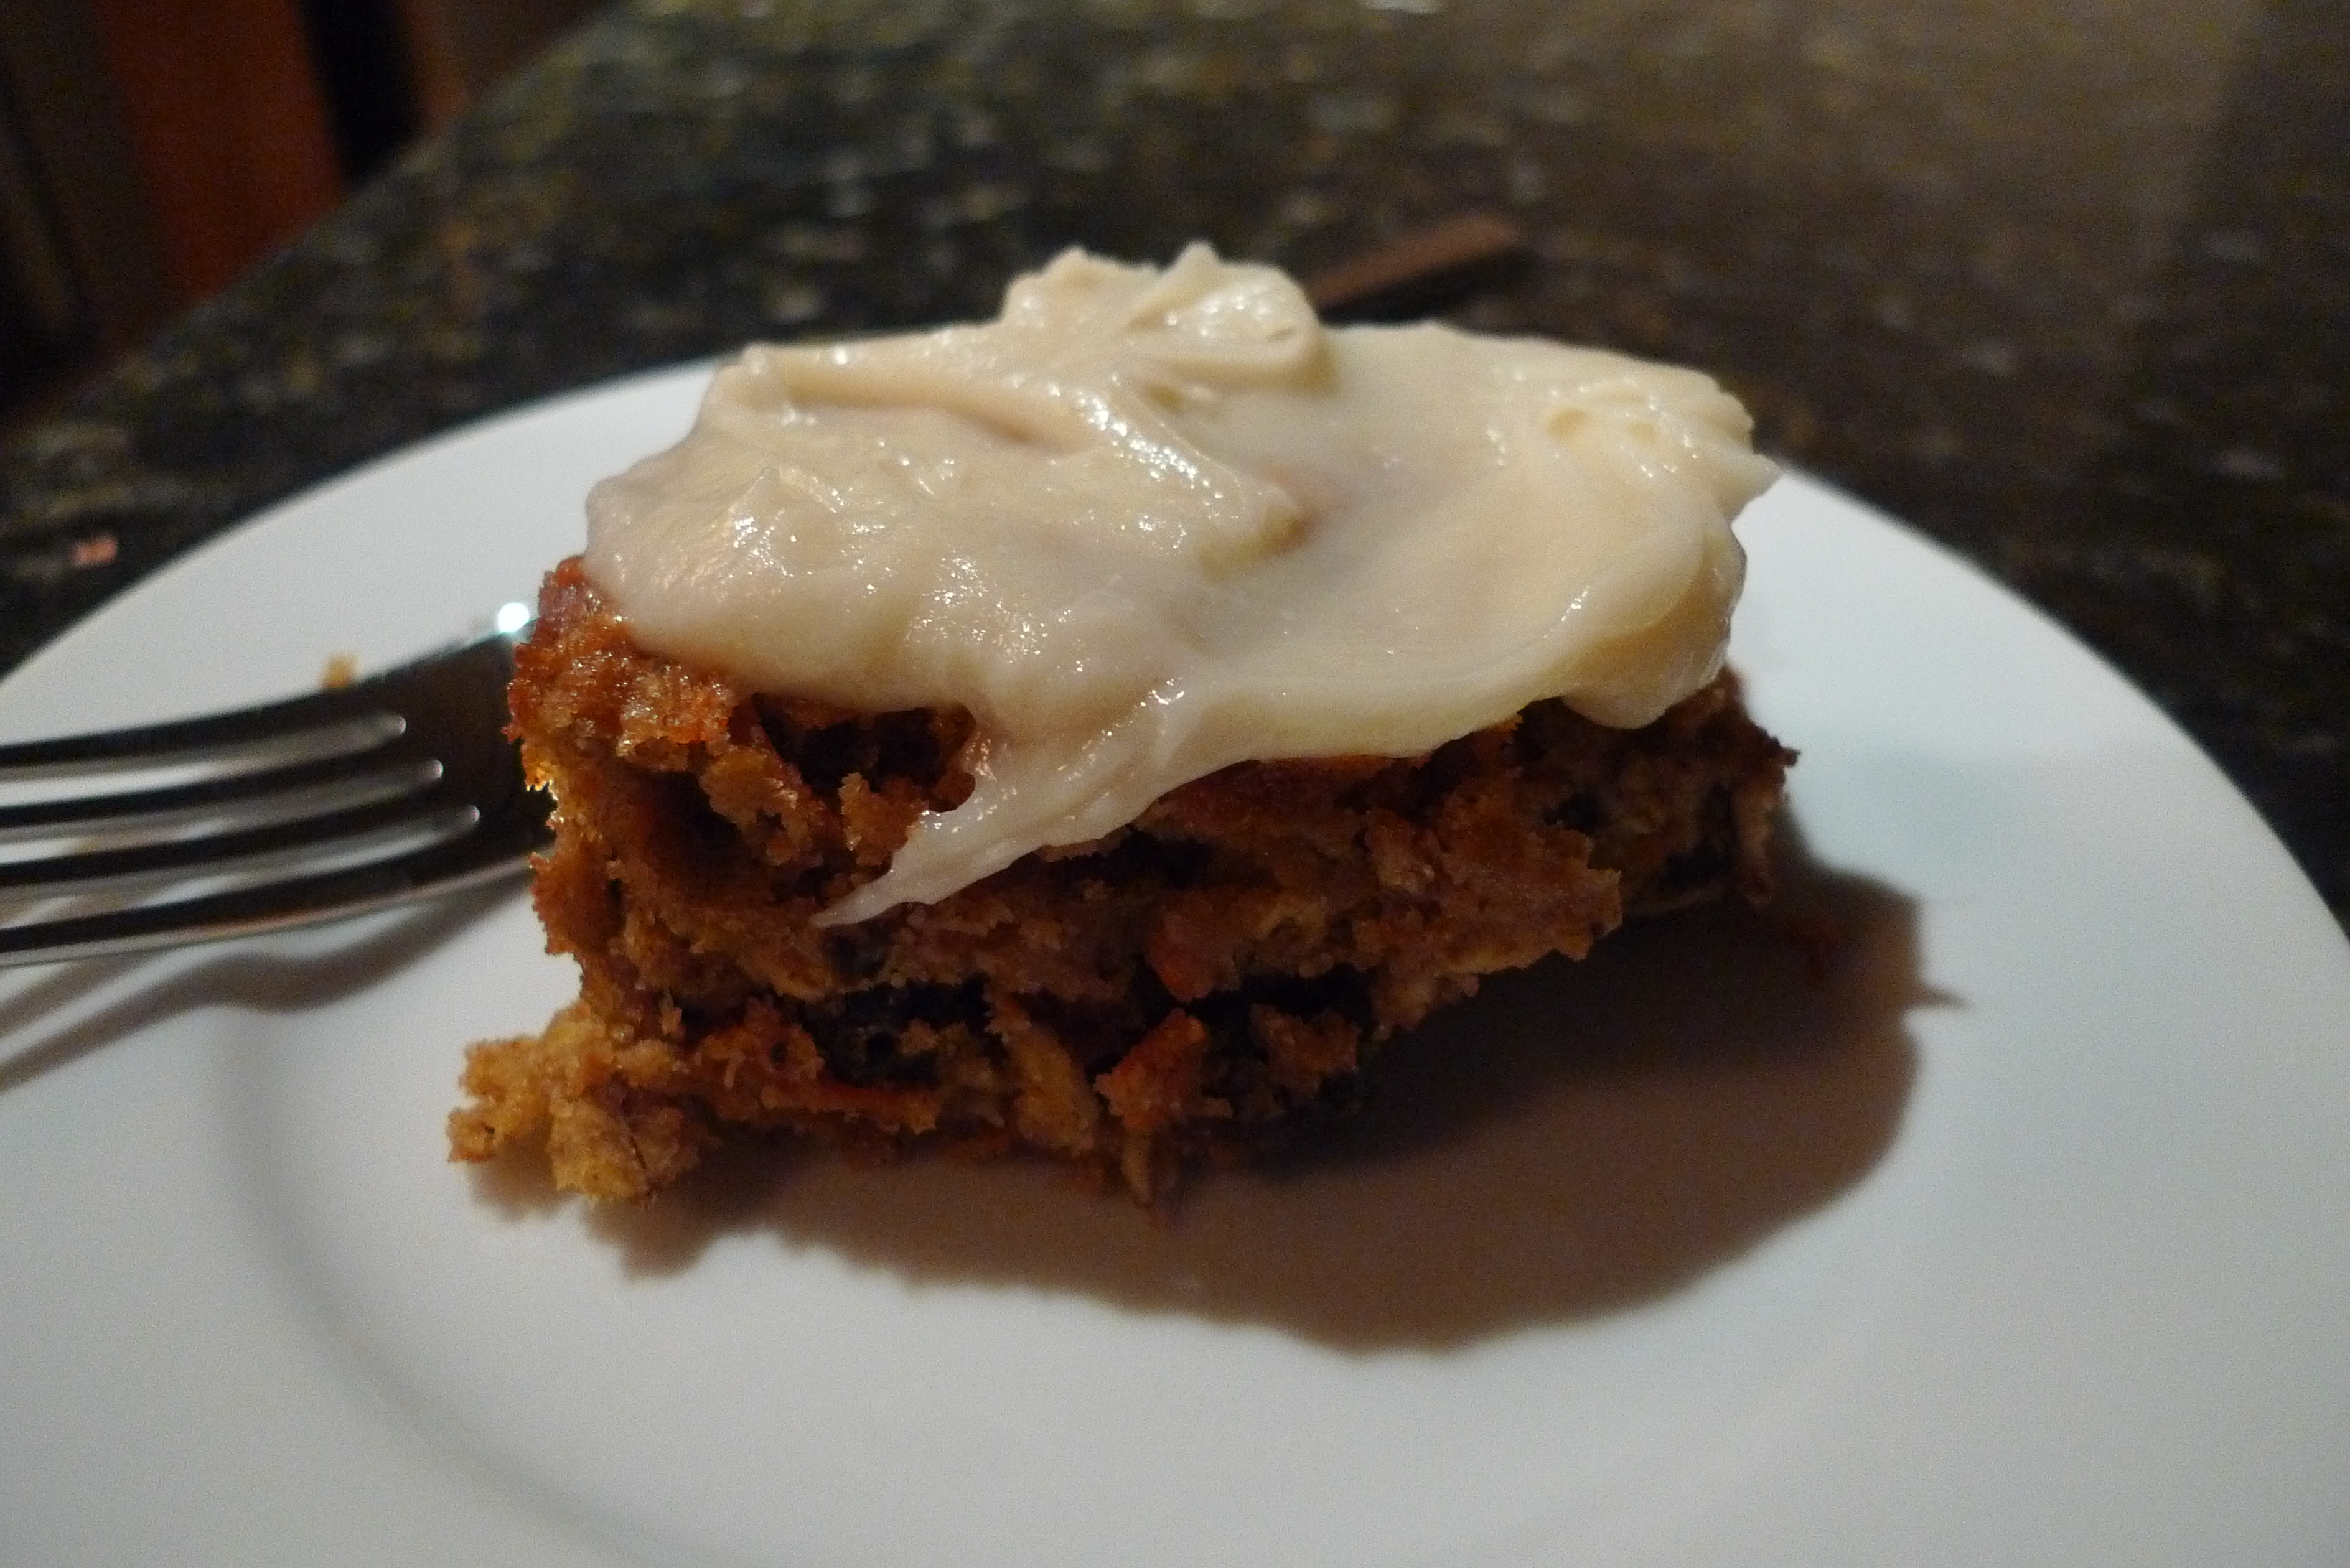
Warm with the powdered sugar glaze...


Made in muffin tins with the Greek yogurt yogurt glaze, topped with nuts and raisins (chilled)....


Thursday, June 28, 2012

Filet Steaks with an Irish Whiskey and Mushroom Cream Pan Sauce


Oh my goody goodness this was good.  Too good.  Way too good.  I'm still amazed I was capable of making such a wonderful dinner.  Last night, we had some left over heavy cream in the refrigerator from the Chocolate Fudge Truffle Cheesecake I made for my mom's birthday last week (you can find this sinful dessert recipe here), and since we almost never have heavy cream, I insisted that I make a dinner recipe using it.  My mom had already bought steak fillets, and I had a recipe saved that I had been wanting to try since it included heavy cream and whiskey (who could go wrong with these two marvelous ingredients!?).  So I altered the saved recipe based on what we had, and it turned out to be the best steak dish I've ever had.  My parents also agree.  It was absolutely perfect....the steaks themselves cut like butter, were super duper juicy, and had a wonderful, meaty flavor.  The sauce was unlike anything I had ever had before.  It had the dominant flavor of beef - from the stock - but the whiskey gave it a zesty burst of flavor, and the cream wasn't overpowering at all; in fact, my parents couldn't even tell there was any cream in the sauce.  It simply blended all the flavors of the ingredients together and made the sauce slightly rich.  I decided to add the mushrooms to the dish last minute, and boy am I happy I did because they went so perfectly with the rich, beefy sauce.  However, if you don't like mushrooms, they can easily be omitted.  This is a heavenly dish that is sure to impress.


Yield: 4 servings


Ingredients:
Four 1 to 1.25 inch pieces beef tenderloin (about 7.5 ounces each)
Kosher salt and freshly ground black pepper
1 tablespoon vegetable oil (if not using a cast iron pan)
1 tablespoon unsalted butter
1 tablespoon finely chopped shallots
5 white mushrooms, sliced (optional)
1/4 cup Irish Whiskey, such as Jameson
1/2 cup beef stock 
1/2 teaspoon Worcestershire sauce
2 teaspoons Dijon mustard
1/2 cup heavy cream
1/2 to 1 teaspoon lemon juice


Directions:

1.
Season each steak generously with salt and pepper. Heat a heavy-based (preferably cast-iron) skillet that's large enough to hold the steaks over high heat until quite hot. (Add the 1 tablespoon vegetable oil if not using cast iron.) Test by touching the edge of one steak to the pan surface; it will sizzle briskly when ready. Immediately drop in the steaks and sear one side for 2 minutes. Sneak a peek to see if the first side is nicely browned. If not, continue to sear that side for another minute or so. Flip the steaks and sear the other side for 2 to 3 minutes. Reduce the heat to medium high, cook for another 2 minutes, flip, and cook until a digital instant-read thermometer in the center of the meat reads 120 degrees F for rare or 125 degrees F for medium rare, another 1 to 2 minutes. Transfer the steaks to the warm platter and let them rest, covered loosely with foil, while you make the sauce.  You can also set the steaks in a separate skillet and place on the "warming" section of your oven if you have it.
2.
To make the pan sauce: Return the unwashed pan to medium heat. Add the butter and let it melt (be careful not to let it burn if the burner is still very hot!). Add the shallots and and cook, stirring, until fragrant and just tender, 1 to 2 minutes.  Add the whiskey and mushrooms and stir with a wooden spoon, scraping up any browned bits stuck to the pan. Add the broth and Worcestershire sauce , raise the heat to medium high, and bring to a boil. Whisk in the mustard and then the cream. Continue to cook at a boil, stirring, until reduced to a saucy consistency, 5 to 7 minutes. Taste the sauce and season with salt, pepper, and lemon juice. Place a steak on each plate, drizzle with the juices left in the steak pan, and serve the steaks with the mushroom cream sauce.

Wednesday, June 27, 2012

Cinnamon Raisin Glazed Biscuits


With the glaze....


My stomach is growling just thinking about these wonderful biscuits.  I made these a few days ago - without the cinnamon and glaze - and I was going to post them but I wanted to take them to the next level.  Both versions of these biscuits are absolutely perfect.  They're buttery, sweet, soft, fluffy, moist, full of juicy raisins and laced with a delicious cinnamon swirl.  The icing just takes them >above and beyond<.  If you prefer a less sweet biscuit, then you can omit the glaze...but if you're like me and have a major sweet tooth, then I definitely recommend it.  Also, if you're not a fan of cinnamon (I've never met anyone who isn't a fan of cinnamon, but who knows...), then feel free to omit that as well.  These biscuits without the glaze and cinnamon are more of a buttery, lightly sweet, tea biscuit, but are still incredible.  They taste best warm from the oven, but are still awesome at room temperature the next day.  Both versions are great for breakfast, dessert, or a snack.

Yield: 8 large biscuits

Ingredients:
  • 1 cup raisins
  • 1 cup hot water
  • 3 1/4 cups all-purpose flour
  • 6 tablespoons white sugar (1/4 cup plus 2 tablespoons)
  • 1 tablespoon baking powder
  • 1/2 teaspoon salt
  • 3/4 cup cold unsalted butter, cut into pieces
  • 1 cup milk
  • 1 tablespoon ground cinnamon

Glaze:
1/2 cup powdered sugar
1 tablespoon milk, or as needed
1/8 teaspoon vanilla extract
desired amount of cinnamon (I used about 1/4 teaspoon)
Directions:
  1. Preheat an oven to 375 degrees F (190 degrees C). Soak raisins in water for 10 minutes; drain, pat dry, and set aside. Line a baking sheet with parchment paper.
  2. Whisk together the flour, sugar, baking powder, and salt in a mixing bowl. Cut in the butter with a knife or pastry cutter until the mixture resembles coarse crumbs. Stir milk into the flour mixture until just moistened. Add the drained raisins. Sprinkle the cinnamon over the dough, and fold in or swirl through with a knife until just blended (this does not need to be evenly distributed; since it can be a cinnamon swirl).  Shape biscuits with lightly floured hands or turn the dough out onto a lightly floured surface and pat or roll the dough out into a 3/4 to 1-inch thick round. Cut dough with a biscuit cutter and place onto the prepared baking sheet.  Let rest at least 10 minutes.
  3. Bake in the preheated oven until golden brown, about 15 minutes.
  4. For glaze, combine all the glaze ingredients until desired consistency is reached and drizzle over hot biscuits.

Friday, June 22, 2012

Fudge Truffle Chocolate Cheesecake

cheesecake-top


This cheesecake is absolutely perfect in every way.  I made this for my mom a few days ago for her birthday, and I couldn't believe how well everything went to prepare it.  I had a chocolate cheesecake recipe saved in my recipe box, and I altered it to make it extra delicious (I don't reveal my secret ways, though!) and it turned out phenomenal.  There's a thin, sweet, slightly crunchy, vanilla-chocolate cookie layer on the bottom....a rich, soft, silky, smooth, cream-cheesy, fluffy, milk chocolatey layer in the middle....and a thin, super rich, dark chocolatey, fudgey ganache layer on top.  It just gets richer and more chocolatey as you work your way up the layers of the cake.   The only thing that was kind of annoying about this recipe is the crust is super messy to make because you have to mix the ingredients by hand...but it comes off your fingers easily (and you can lick them when you're done pressing it into the pan!) and is totally worth the effort.  This was the second cheesecake I've ever made that didn't crack (behind my incredible strawberry cheesecake recipe found here).  Even if your cheesecake does crack, you can always cover it with the oh-so-rich-and-delicious chocolate ganache.  The three wonderful layers of this cheesecake really make it seem as though you're biting into a chocolate truffle...but I'd rather have this cheesecake over a chocolate truffle any day.  Serve each slice with a dollop of whipped cream and you'll never order a chocolate cheesecake at the Cheesecake Factory ever again. (Because this recipe is sooo much better!!!)

Yield: 1 9-inch springform pan (about 14 servings)
Ingredients:
  • 1 1/2 cups Nilla wafer crumbs
  • 1/2 cup confectioners' sugar
  • 1/3 cup unsweetened cocoa powder
  • 1/3 cup butter, softened
  • 2 cups semi-sweet chocolate chips
  • 3 (8 ounce) packages cream cheese, softened 
  • 1 (14 ounce) can sweetened condensed milk, at room temperature
  • 4 eggs, at room temperature
  • 2 teaspoons vanilla extract
Directions:
  1. Preheat oven to 300 degrees F (150 degrees C).
  2. In a large mixing bowl, mix together crushed vanilla wafers, confectioners' sugar, cocoa, and butter or margarine by hand. Press ingredients into a 9 inch springform pan (a 10-inch will work also).
  3. In the top of a double boiler, melt the chocolate chips, making sure that they are very smooth.
  4. In a large bowl, beat cream cheese until fluffy with an electric mixer. Gradually beat in condensed milk until smooth. Mix in melted chocolate, eggs, and vanilla. Beat with electric mixer on low speed until the ingredients are thoroughly blended. Pour the filling into the prepared crust.
  5. Bake at 300 degrees F (150 degrees C) for 55 minutes.  The cake will seem underbaked in the center, but will continue to cook after you turn the oven off.  Turn the oven off and leave the cake in the oven, with the oven door slightly cracked, for at least one hour (this prevents the cake from cracking).  Carefully remove the cake from the oven and allow it to cool in the refrigerator for at least 3 hours (or preferably overnight) before topping with the chocolate ganache. 


For the Chocolate Ganache:

Ingredients:

  • 4.5 ounces bittersweet chocolate, chopped
  • 1/2 cup heavy cream

Directions:

  1. Place the chocolate into a medium bowl. Heat the cream in a small sauce pan over medium heat. Bring just to a boil, watching very carefully because if it boils for a few seconds, it will boil out of the pot. When the cream has come to a boil, pour over the chopped chocolate, and whisk until smooth.
  2. Allow the ganache to cool slightly before pouring over a cake (about one minute). Start at the center of the cake and work outward. Spread a thin layer all over the top of the cake, spreading just over the sides.  Refrigerate for at least 30 minutes before serving.

Wednesday, June 20, 2012

Mimi Cafe's Crepes


       Have you ever been to Mimi's Cafe?  If not, then man are you missing out.  It's a breakfast place (but they do have lunch and dinner options), and everything there is so delicious.  Omelets, pancakes, french toast, crepes, you name it.  They usually give you a huge muffin on the side of your meal, and they have this amazing, sweet, cake-like bread that is served on the table before you order. You can definitely say the amount of food is worth the price.  I've gotten the  Cinnamon Brioche French Toast (A cinnamon brioche roll sliced and dipped in Mimi's French toast batter and griddled to perfection.), stuffed French Toast (stuffed with sweet cream cheese and topped with berries), chocolate chip pancakes (usually I wouldn't order something as simple as this at a restaurant, but they really are incredible), and a crab-avocado omelet.  All to die for.  I did successfully remake the Cinnamon Brioche French Toast here on my blog.  
        So the other day I got an email from Mimi's, since I'm on their mailing list, and it contained the recipe for the crepes they use!  Crepes are one of their specialties, so I was really surprised that they were willing to reveal it, but I'm so happy they did because they totally rock!  It is the perfect, standard crepe recipe, and you can make it sweet or savory.  I had one with Nutella, and two with blueberries and home made caramel sauce, all filled with whipped cream.  There are a couple recipes listed underneath the crepe recipe on the site below, and I can't wait to try them.  I really loved my blueberry/caramel crepes the best, so I definitely encourage you to try it!  The caramel sauce was left over from my oh-so-delicious Chocolate Waffles I made a few weeks ago, and you can find the recipe for that here.

And you can find Mimi's awesome Crepes here.

Tuesday, June 19, 2012

Chocolate Cream Pie


Chocolate Pie

IMG 2352 1024x768 Chocolate Cream Pie

I'm drooling right now just looking back over these pictures.  I made my daddy a chocolate cream pie for Father's Day, and it was declared by him "the best pie he's ever had."  I couldn't believe how perfect it turned out.  It was so, so, so easy to make - yet tasted sinfully rich.  The crust is just a basic, flaky pie crust; I wouldn't use any other crust on this if you mainly want to taste the chocolate layer.  This layer is rich, fudgey, silky, and oh-so chocolatey.  It's also kind of thin, but you definitely won't mind because it's so rich anyways.  And even though it is very rich, it doesn't fill you up like a cheesecake would (since it's a thin layer) - so you will definitely want to go back for seconds(:  This pie was over half way eaten the first night I made it!  And that's just between my mom, dad and I, and it was right after we'd gone out for Father's Day dinner. This is definitely the only chocolate cream pie I will ever use from now on!

Yield: 1 9-inch pie

Ingredients:

  • 1 (9 inch) pie crust, baked
  • 1 1/4 cups white sugar
  • 2 tablespoons all-purpose flour
  • 2 tablespoons cornstarch
  • 1/4 teaspoon salt
  • 1 1/2 cups milk
  • 4 egg yolks
  • 2 (1 ounce) squares unsweetened chocolate
  • 1 tablespoon butter
  • 1 teaspoon vanilla extract

Thawed Cool Whip or home made whipped cream
Chocolate shavings, toasted coconut, or chopped candy bar pieces

Directions:

  1. In medium saucepan, combine sugar, flour, cornstarch and salt. In a medium bowl, beat milk and egg yolks until smooth. Gradually stir into sugar mixture. Stir constantly over medium heat until mixture thickens and comes to a full boil. Boil and stir for one minute.
  2. Remove from heat and stir in chocolate, butter and vanilla. Stir until melted.
  3. Pour into pie shell. Place plastic wrap over filling to prevent skin from forming and chill for several hours. Top with Cool Whip or whipped cream and toppings if desired.

Avocado, Tomato, and Mango Salsa


This is the best salsa I have ever had.  I was seriously eating it by the spoonful!  I'm not a big salsa fan unless they are "sweet" salsas - like mango, pineapple, and peach - because I don't care for spicy things, but this recipe was absolutely perfect.  It was sweet, bursting with flavor, and just a little bit spicy.  If you prefer spicy salsa, then you can just add more jalapenos!  It's that easy.  The amount of flavor in this salsa is just amazing.   To bite into that creaminess of the avocado, the bite of the pepper, the sweetness of the mango, and - of course - the garlic and cilantro were to die for.  It's nothing like store bought salsa, which is ketchupy and gross. This salsa is swimming with chunks of sweet mango (the mango was definitely my favorite part) and tossed with creamy avocado, tomato and cilantro.  It's incredibly refreshingThe blend of flavors was magnificant.  I made this salsa for my daddy for Father's Day, since he's always begging me to make him a salsa, and I'm so happy I finally did!  I served this with steak fahitas (but I recommend serving this over white fish or fish tacos) and my whole family gobbled so much of this up even before the fajitas were ready.


You can find the best salsa recipe ever here.

Sunday, June 17, 2012

Mom's Buttermilk Cookies


Have you seen my Lime Tea Cookies that I recently posted here? The lime cookies are fluffy, buttermilk-like cookies, and they triggered my memory of this buttermilk cookie recipe. I made them a few months ago with my friend - I was teaching her how to bake...and we were in the mood for some sugar cookies - and these buttermilk cookies turned out absolutely phenomenal.   I had only made buttermilk cookies once before this recipe in a foods class at my school, and I thought the cookies we made in class were really tasty - like a fluffy, sugar cookie.  These "Mom's Buttermilk Cookies" were the first recipe listed under "frosted cookies" in my Taste of Home: Baking Cookbook, so I knew they had to be delicious when my friend and I decided to make them.  And we were totally right.  Because all I remember is each of us dancing around the room, finishing off nearly the entire batch of cookies ourselves, saying "Mmmmm...these are SO FREAKING GOOD!"  The frosting is the best part.  I remember the entire cookie just melted in my mouth and I couldn't stop eating them - especially fresh from the oven.  I'm so glad I remembered this recipe...I honestly have no idea how I forgot about them.  

You can find this incredible cookie recipe here.

Lime Tea Cookies


I don't know about you guys reading this, but I love the taste of lime.  Especially key lime pie! And now - even more so - in these tasty cookies! There really aren't many recipes out there with lime as the dominant flavor, so I was super excited ]  when I saw a recipe for lime cookies.  These cookies are just like buttermilk cookies (or fluffy sugar cookies) but they have an amazingly refreshing flavor of sweet lime.  The cookie itself is super light, fluffy, buttery, and delicately sweet with a nice hint of lime.  The thin layer of glaze on top is my favorite part - it's sweet and bursting with citrus-lime flavor. These cookies hardly lasted a day in my house!  They are so perfect for a warm, spring day.


Ingredients:

  • 2 teaspoons lime juice
  • 1/3 cup milk
  • 1/2 cup unsalted butter, softened
  • 3/4 cup white sugar
  • 1 egg
  • 2 teaspoons lime zest
  • 1 3/4 cups all-purpose flour
  • 1 teaspoon baking powder
  • 1/4 teaspoon baking soda
  • 4 tablespoons lime juice
  • 1/2 cup white sugar
Directions:
  1. Preheat oven to 350 degrees F (175 degrees C). Combine the 2 teaspoons of lime juice with the milk, let stand for 5 minutes.
  1. In a large bowl, cream together the butter and 3/4 cup sugar until light and fluffy. Beat in the egg, then stir in the lime zest and milk mixture. Combine the flour, baking powder and baking soda, blend into the creamed mixture. Drop by rounded spoonfuls onto the ungreased cookie sheets (or parchment paper).
  1. Bake for 8 to 10 minutes in the preheated oven, until the edges are light brown. Allow cookies to cool on baking sheets for 5 minutes before transferring to a wire rack to cool completely.
  1. To make the glaze, stir together the remaining lime juice and sugar. Brush onto cookies while still warm.

Thursday, June 14, 2012

Tenderest Pork Tenderloin


This recipe is absolutely phenomenal.  I'm so amazed at how easy this recipe is.   Simple ingredients, simple cooking method, and very quick – a perfect weeknight dinner.  It's very rare that I experience moist pork recipes (unless it's pulled pork), and - I am not kidding you - this cut like butter.  It was extremely soft and tender, and by far the BEST pork tenderloin I've ever had.  It's incredibly flavorful, and I wouldn't change anything about it.  This is seriously as good as pork can get.  I have to give all the credit to my mom, who created this recipe herself.  My mom is way better than me at cooking meats, and she almost always perfects them.  Now baking...that's my specialty(:


Ingredients:

  • 1/4 cup olive oil
  • 1/4 cup soy sauce
  • 1 clove garlic, minced
  • 3 tablespoons dijon honey mustard
  • salt and pepper to taste
  • 1 (2 pound) boneless pork loin roast

Directions:

  1. Whisk together the olive oil, soy sauce, garlic, mustard, salt, and pepper in a bowl. Place the pork loin in a large sealable plastic bag and pour in the marinade. Marinate in the refrigerator for 3 hours before cooking.
  2. Preheat an outdoor, gas grill to medium heat.
  3. Transfer the pork loin to the preheated grill.
  4. Cook until the pork is no longer pink in the center, 35 to 45 minutes. An instant-read thermometer inserted into the center should read 160 degrees F (70 degrees C).

Churros


I will never forget the first time I had a churro.  I was at a local mall, walking by the Great American Cookie store (best place ever!), and I begged my mom if I could get something due to my caving in toward the mouth-watering smells of baked goods.  She said yes, of course, and I was about to order a couple cookies when I spotted a long, sugar coated, stick-like thing - a churro.  Since I was in Spanish at the time, I had heard of them and seen them in my textbooks.  I knew they were a popular breakfast/snack item in Mexico and Spain, and people often ate them with coffee or chocolate.  So I decided to try one...and I loved it sooo much.  It was crunchy on the outside, with a sweet, cinnamon sugar coating, and super moist, cakey, and soft on the inside.  It was like a cinnamon sugar donut, but ten times better.  This morning, I decided to try making it myself.  I was surprised at how easy the recipe I had saved was; there were no eggs, and the dough itself only had three main ingredients (vegetable oil, sugar and flour).  The result was even better than the churro I had at the cookie store! Mine literally -->melted in your mouth<--, and were incredibly addicting.  I think mine tasted so much better because they were fresher and very warm, whereas the one I had at the mall was room temperature and had probably been made a few hours earlier.  I was planning on saving one of my churros to see how it tasted at room temperature, but they didn't last that long - now that I think about it... the lasted maybe five minutes. These are very tasty with coffee, chocolate, or dipped in caramel sauce, but I love them the most hot from the frying pan - coated in lots of cinnamon sugar - with a refreshing, cold glass of milk on the side.  Yum.

Yield: about 2 to 3 servings (about 8 donut-hole sized churros, and 3 larger, long ones)

Ingredients:

  • 1 cup water
  • 2 1/2 tablespoons white sugar
  • 1/2 teaspoon salt
  • 2 tablespoons vegetable oil
  • 1 cup all-purpose flour
  • 2 quarts oil for frying (I used vegetable oil)
  • 1/2 cup white sugar, or to taste
  • 1 teaspoon ground cinnamon
Directions:
  1. In a small saucepan over medium heat, combine water, 2 1/2 tablespoons sugar, salt and 2 tablespoons vegetable oil. Bring to a boil and remove from heat. Stir in flour until mixture forms a ball.
  2. Heat oil for frying in deep-fryer or deep skillet to 375 degrees F (190 degrees C). Pipe strips of dough into hot oil using a pastry bag, or make round, bite sized balls with your hands.  Fry until golden; drain on paper towels.
  3. Combine 1/2 cup sugar and cinnamon. Roll hot, drained churros in cinnamon and sugar mixture.

Monday, June 11, 2012

English Flapjacks


Have you ever had a recipe you kept around, but never really got around to trying?  That's the situation I was in when I spotted this recipe in my recipe box.  I always thought a flapjack was a pancake, and I thought it was weird how an "English Flapjack" is a dessert/snack oatmeal bar that's very common in England, so I decided to try it.  Besides the rolled oats, it definitely didn't seem like the healthiest thing in the world, but who can go wrong with lots of butter and sugar?  It seemed like a fun recipe worth trying...and I'm very glad I did!  I had never tasted anything like it before...it's chewy, sweet, buttery, and sooo delicious!!  It's one of my new favorite bars! And super duper easy to make.  I altered the saved recipe I had a lot based on the reviews, and the flapjacks turned out awesome!  You definitely HAVE to wait for it to cool completely to actually know what the real taste/texture is supposed to be like.  Even when just a little warm, the consistency is very different than what it should be.  I put my bars in the freezer for about 30 minutes after baking to speed up the cooling process, but the bars didn't reach the final consistency until about 2 hours later (I tasted it often, of course, and they were really really really tasty after each bite - even warm - but tasted best when completely cooled).  These are so yummy as a snack, breakfast, or dessert, and I can't wait to make them again with different variations (chocolate chips, cinnamon, nuts, cinnamon chips, butterscotch chips, dried fruit, etc)!  It's like an oatmeal cookie bar...but way better(:

Ingredients:

  • 1 cup butter or margarine
  • 1/2 cup packed brown sugar
  • 1/2 tablespoons golden syrup or corn syrup
  • 2 1/3 cups rolled oats

Directions:

  1. Preheat the oven to 350 degrees F (175 degrees C).
  2. In a saucepan over low heat, combine the butter, brown sugar and golden syrup. Cook, stirring occasionally, until butter and sugar have melted. Stir in the oats and raisins until coated. Pour into an 7 or 8 inch square baking pan. The mixture should be about 1 inch thick.
  3. Bake for 20-25 minutes in the preheated oven, or until the top is just golden (they won't look "done" but do not over bake!  The bubbly/liquidy parts will harden when cooled). Cut into squares, then leave to cool completely before removing from the pan (at least 3 hours).

Parmesan Roasted Corn on the Cob


Let me just start off by saying that this is THE BEST corn on the cob you will EVER eat!  I'm not exaggerating in the slightest.  I made this recipe last night because we just got a new grill, and what's a better way to test out a new grill than with cheeseburgers and corn on the cob??  I saw this featured on the Food Network a few weeks ago on Paula Deen's show (Paula's Home Cooking), so I decided to try it out.  The flavor was absolutely incredible.  I've never had such a flavorful corn in my entire life!  The mayonnaise completely disappears when cooked, leaving you with the juiciest corn you could ever imagine biting into.  The Parmesan cheese and chili powder give the corn a slightly spicy and salty burst of flavor.  The only fault to this recipe is that some of the Parmesan and chili powder will come off with the foil when you unwrap it, but if you just scrape it off with a knife and spread it back on the corn, it's a super easy fix.  My family decided that we will never eat corn another way again!  Thank you, Paula Deen!


Ingredients:

  • 1/2 cup mayonnaise
  • 5 ears corn, husks and silk removed
  • 1 cup shredded Parmesan Cheese
  • 1 tablespoon chili powder
  • 1 teaspoon salt
  • 1 teaspoon freshly ground black pepper

Directions:

Prepare grill.
Brush a thin layer of mayonnaise on corn. Sprinkle the corn with cheese, chili powder, salt and pepper. Wrap each corn with foil and place on the grill. Turn occasionally and cook for about 10 minutes (until kernels begin to brown). Serve warm.

Sunday, June 10, 2012

Grilled Mustard-Glazed Pork Loin

Grilled Mustard-Glazed Pork Loin

This is my new favorite marinade ever!!  It is a recipe from America's Test Kitchen, so you know it's gotta be awesome because they test it so many times.  Two surefire ways to dress up a pork roast are to give it a flavorful, deeply caramelized crust on the grill and serve it with a savory-sweet mustard glaze. This Grilled Mustard-Glazed Pork Loin recipe has thebest of both worlds ]. Leaving the boneless pork loin roast untrimmed added moisture and flavor—and scoring the fat kept it from tasting too fatty. For the mustard glaze, apple jelly was a perfect complement to the spicy crunch of grainy mustard, and both married well with the other glaze ingredients—brown sugar, garlic, and fresh thyme. To fully infuse the Grilled Mustard-Glazed Pork Loin with mustard flavor, the glaze is applied before, during, and after grilling.  This is incredibly delicious thinly sliced on a sandwich the next day, with some thinly sliced apple and a little spread of apple butter. I can't wait to use this marinade for chicken, too!

Serves 6 to 8
Dijon and yellow mustards also work well in the glaze, but make certain to use apple jelly (which is translucent), not apple butter (which is opaque). Look for a pork roast with about 1/4 inch of fat on top and tie the roast at 1-inch intervals to ensure an even shape. Keep a squirt bottle of water on hand during browning to quell any flare-ups.

Ingredients:


    • 1/2cup grainy mustard
    • 6tablespoons apple jelly
    • 2tablespoons dark brown sugar (light is fine too)
    • 2tablespoons extra virgin olive oil
    • 1garlic clove, minced
    • 2teaspoons minced fresh thyme leaves
    • 1/2teaspoon salt
    • 3/4teaspoon pepper
    • 1boneless pork loin roast (2 1/2 to 3 pounds), fat on top scored lightly and tied (see note)
  • 1. Open bottom vent on grill. Light large chimney starter filled with charcoal briquettes (about 100 coals) and burn until covered with fine gray ash. Pour coals evenly over one half of grill. Set cooking grate in place, cover, open lid vent completely, and let grill heat for 5 minutes. Meanwhile, whisk mustard, jelly, sugar, oil, garlic, thyme, salt, and pepper in medium bowl. Reserve one-third of mustard mixture for serving. Coat meat completely with half of remaining mustard mixture.
  • 2. Scrape and oil cooking grate. Grill pork directly over coals until well browned all over, 12 to 15 minutes. Place pork fat-side up on cooler side of grill and brush with about one-third of remaining mustard mixture. Cover, open lid vents completely, and cook, brushing with mustard mixture every 10 minutes, until meat registers 140 degrees, 25 to 40 minutes.
  • 3. Transfer pork to cutting board, tent with foil, and let rest 15 minutes (temperature should rise to 150 degrees). Pour accumulated juices into reserved mustard mixture and whisk to combine. Cut roast into 1/4-inch slices, transfer to platter, and spoon mustard mixture over top.  Serve.