Showing posts with label vegetable oil. Show all posts

Friday, March 29, 2013

Beef Bourguignon (Beef Stew With Red Wine)


Beef Bourguignon

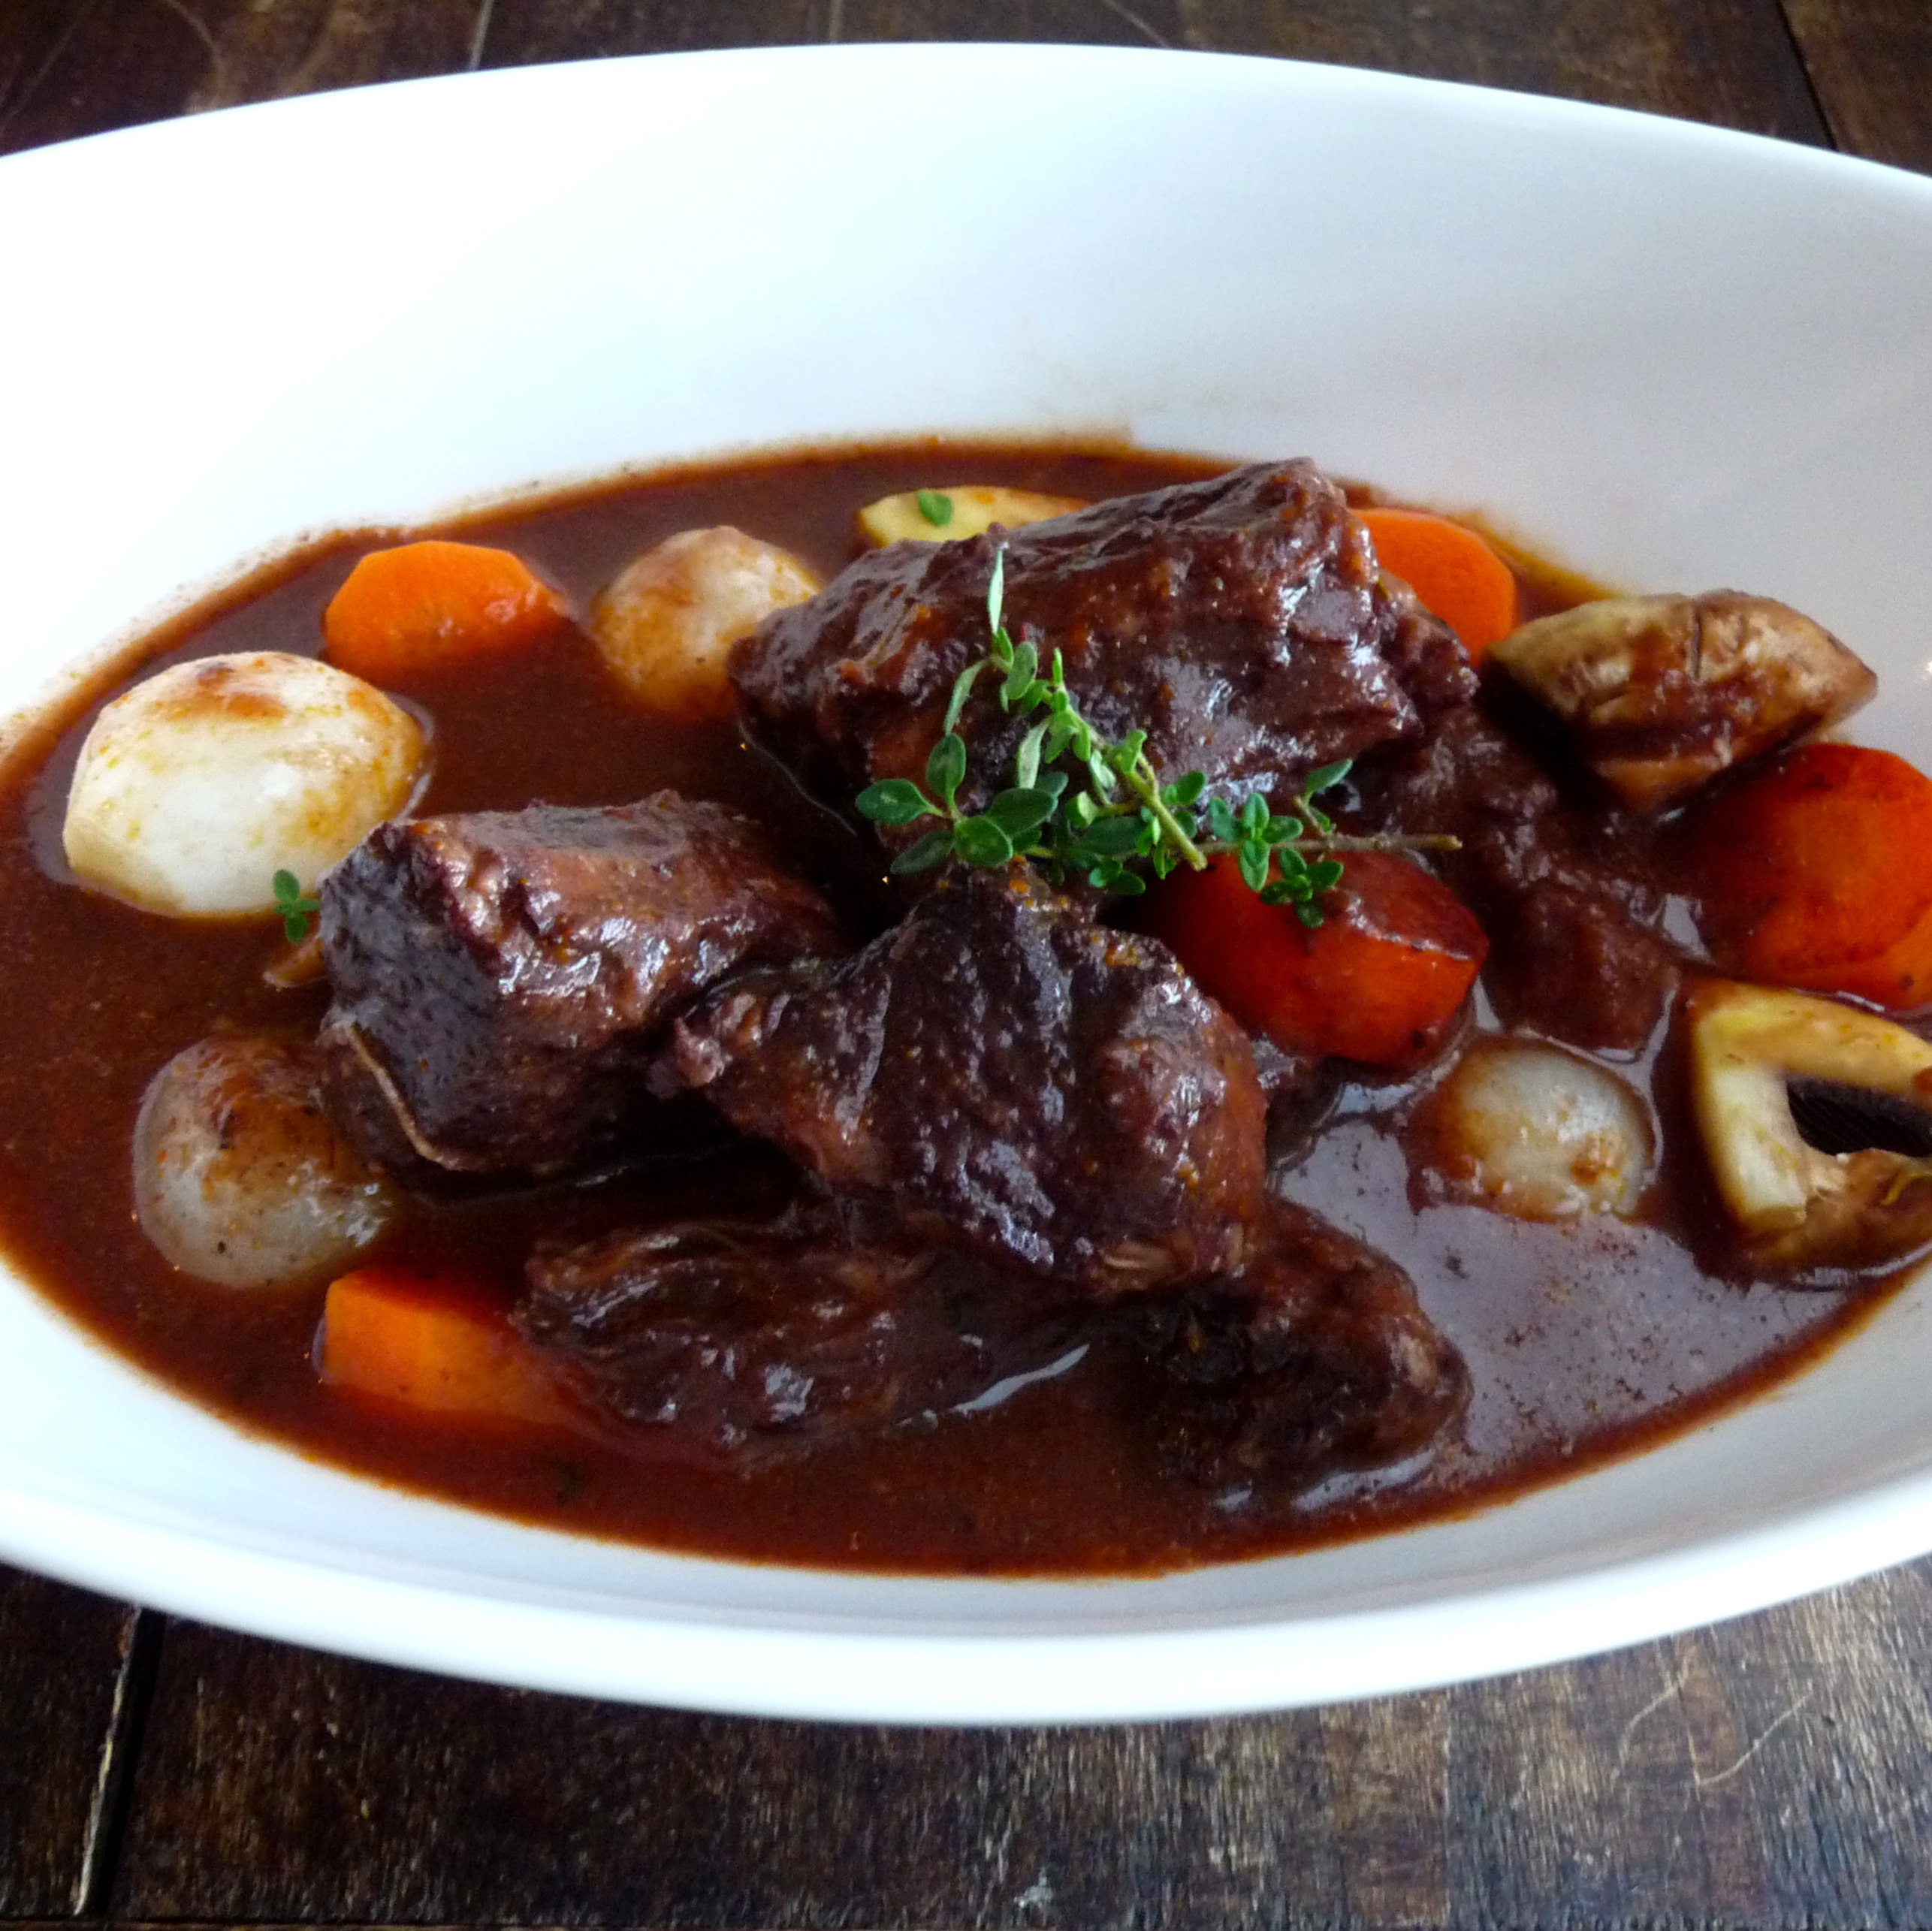
Unfortunately, I do not know how to pronounce "Bourguignon." I wish I did.

However, I do know that this soup, despite the rather intimidating name, is fabulous. My mom declared it "the best beef stew [she has] ever tasted." The red wine gives this dish such a rich, flavorful, and soul-satisfying taste that will be sure to impress a crowd. After making this, I not only fell in love with the soup, but I realized that I absolutely adore pearl onions! They are so sweet and tasty, with a satisfying crunch that I had never experienced before. Also, t
here are a few key details to remember when making the stew: Be sure to brown the meat well in the beginning, use a good quality red wine that you would happily drink, and, if possible, make it a day in advance to let the flavors develop. Unlike a soft, mushy, murky stew, the components of this bourguignon stay intact just enough - so that you know what you're eating, but it still feels cohesive. My family be making this in big batches all winter long.

Yield:
4-6 servings

Ingredients
3 tablespoons vegetable oil
1 medium onion, diced
1 medium carrot, peeled and diced
4 cloves garlic, diced
1 teaspoon dried, crushed thyme
2 pounds cubed stewing beef (chuck or sirloin tip)
1 1/2 teaspoons kosher salt
1/2 teaspoon freshly ground black pepper
2 tablespoons all-purpose flour
3 cups red wine
1 cup beef broth
1 tomato, seeded and diced
2 cups pearl onions
1/4 pound bacon, cut into 1/2-inch strips
1/4 pound mushrooms quartered
2 tablespoons minced fresh flat-leaf parsley
Buttered Egg Noodles (optional)


Instructions

Heat 1 tablespoon of the oil in a Dutch oven or ovenproof stewpot, and sauté the onion, carrot, garlic, and thyme over medium heat until browned, 8 to 10 minutes. When the vegetables are nicely colored, transfer them to a bowl. Wipe out any little bits of vegetable clinging to the pan so they don't burn when you sear the beef.

Pat the meat cubes dry and season them with 1/2 teaspoon of the salt and 1/4 teaspoon of the pepper. Add 1/2 tablespoon of the oil to the pan and sear the beef in batches over high heat until it is a rich mahogany brown on all sides. This will take approximately 5 to 7 minutes depending on the thickness of the meat. Cubes tightly packed in the pan won't brown properly. Clean out any juices which are released before the next batch. Over high heat add 1/2 tablespoon of oil for each batch, then sauté the meat until browned on all sides.

Preheat the oven to 375 degrees F. Return the vegetables and the meat to the pan, dust the meat and vegetables with the flour, and cook for 2 minutes over medium heat, stirring frequently. Toasting the flour helps to develop the overall flavor of the stew. Add 2 cups of the red wine to cover the beef and bring to a boil. Add the tomato and season the stew with the rest of the salt and pepper. 

Place the stew in a crock put set for low and cook 7-8 hours, or until the meat is tender. (If as the stew simmers the wine reduces below the meat, add a little water.)

After at least 3 hours, bring a medium pot of water to a boil. To peel the pearl onions, trim the roots and make a small X with a paring knife in the other end. Boil the onions for 3 minutes, spoon them out, and set them aside to cool. Then squeeze the onions out of their skins. In the same water, blanch the bacon pieces for 3 to 4 minutes, and keep any grease.

Heat a separate medium skillet, add the remaining oil, and brown the bacon and onions. Add the mushrooms and cook over high heat until golden brown. Pour any excess fat into the slow cooker.  Add the final cup of red wine to the vegetables, and simmer until the onions are tender, about 10 minutes. Add this mixture to the slow cooker.

When the beef is tender, pour the stew into a warm bowl, dust with the minced parsley, and serve with buttered noodles if desired, or crusty bread.

Friday, January 18, 2013

Toasted Coconut Banana Bread


I've been trying to find the perfect, classic banana bread recipe, and I have not had any luck with that yet, however....during my search, I found this delicious alternative.  Coconut and banana are just so amazing together, am I right?  The combo reminds me of summer: drinking pina-coladas....just so refreshing!  This bread is also not too sweet, and has just the right amount of banana flavor.  In this recipe, your classic banana bread jumps up to a whole new level. Finely shredded coconut adds a sweet crunch to this moist, flavorful treat.  I recommend it plain, but I highly recommend it with these loaded up variations: served warm with a scoop of vanilla ice cream/whipped cream and/or chocolate chips, with coffee for breakfast, chilled in the refrigerator, or toasted with cream cheese frosting and/or nutella and/or peanut butter.

Yield: 1 loaf (about 10-12 servings)

Ingredients:
1 3/4 cups all-purpose flour
1/2 cup sugar

2 teaspoons baking powder
1/2 teaspoon baking soda
1/4 teaspoon salt
2 beaten eggs, at room temperature
1 cup mashed, very ripe bananas (2 large or 3 medium bananas)
1/3 cup vegetable oil
2 tablespoons milk
1 1/4 teaspoons vanilla
1 3/4 cups flaked coconut, toasted

Instructions:

Grease a 9-by-5-by-3-inch loaf pan; set aside. In a large mixing bowl stir together flour, sugar, baking powder, baking soda, and salt. Make a well in the center. In a medium mixing bowl combine beaten eggs, mashed bananas, oil, milk, and vanilla; mix well. Add egg mixture to flour mixture; stir just till combined. (The batter should be lumpy.) Fold in toasted coconut.


Pour batter into prepared loaf pan. Bake in a preheated 350 degrees F oven for 45 to 55 minutes, or till a toothpick inserted near the center comes out clean.

Cool in pan on a wire rack for at least 10 minutes before removing to a wire rack.  Serve warm, at room temperature, and/or chilled.

Friday, November 9, 2012

Sweet Potato Cake with Cream Cheese Frosting


pumpkin pie fork

Woah now.  Sweet potato cake?  There's sweet potato pie...and pumpkin cake...and potato bread...and sweet potato casserole...but sweet potato cake?  Yeah okay so it sounds a little strange at first, but it's really not all that weird when you think about it.  Sweet potatoes are super similar to pumpkin, and there's pumpkin cake, so why not have a sweet potato cake?  At least this is what I was thinking before I made this magnificently scrumptious masterpiece.  I brought this to school for a party, and all my friends - and the teachers - raved about it. It is SO amazing.  The secret ingredient in this recipe is the beer.  I don't know the scientific reason for it, but beer makes baked goods so incredibly moist and have the softest texture.  Oh and I haven't even started on this cream cheese frosting.  It's like heaven in your mouth.  Beating it for 3 minutes makes it fluffy and it melts in your mouth.  And the cinnamon flavor mixed with the sweet potato flavor makes the whole dish just scream fall.  And with fall comes Thanksgiving(:  This cake may just be on our Thanksgiving table this year...

Yield: 1 9x13 inch pan

Ingredients
1 cup white sugar
3/4 cup lightly packed brown sugar
3/4 cup vegetable oil
3 eggs
1 teaspoon vanilla extract
2 cups cooked, mashed sweet potatoes
2 cups all-purpose flour
3 teaspoons baking powder
2 teaspoons baking soda
1/4 teaspoon salt
1 tablespoon ground cinnamon
1 pinch of nutmeg

Directions
1.Preheat the oven to 350 degrees F (175 degrees C). Grease and flour a 9×13 inch baking dish.
2.Stir together the sugar and vegetable oil in a large bowl until smooth. Beat in the eggs one at a time, then stir in the vanilla and sweet potatoes. Combine the flour, baking powder, baking soda, salt, nutmeg and cinnamon in a separate bowl; stir into the batter 1 cup at a time, alternating with the beer just until everything comes together. Spread the batter evenly in the prepared pan.
3.Bake for 30-35 minutes in the preheated oven, or until a knife inserted into the center of the cake comes out clean. Cool completely before frosting (optional) or serving.

Melt-In-Your-Mouth Cream Cheese Frosting: 
  • 1/2 cup of butter (1 stick), room temperature
  • 8 oz of Philly cream cheese (1 package), room temperature
  • 2 - 3 cups of powdered sugar
  • 1 teaspoon of vanilla extract

Instructions

1 With an electric mixer, mix the butter and cream cheese together, about 3 minutes on medium speed until very smooth. Scrape down the sides and bottom of the bowl to ensure even mixing.
2 Add the vanilla extract and mix. Slowly add the powdered sugar. Keep adding until you get to desired sweetness and thickness.

Monday, September 3, 2012

Sweet and Tangy Coleslaw


I do not like coleslaw with mayonnaise...yuck.  Mayonnaise in coleslaw is so heavy and gross, in my opinion. However, I love vinegar based coleslaw, and this is the BEST Cole Slaw recipe ever!!  America's Test Kitchen has yet another success.  I served this with barbecue sandwiches and it was such a delicious, southern meal.  This is now my go-to coleslaw recipe.


Published May 1, 2011.  From Cook's Illustrated.
WHY THIS RECIPE WORKS:
To keep our coleslaw recipe crisp, we needed to find a way to make the cabbage shed its excess water. Our usual technique involves salting the cabbage for a few hours, but we were determined to speed up the process. We discovered that sugar, which we were already including in our coleslaw recipe, has the same effect on cabbage that salt does. Microwaving a batch of shredded slaw that we’d tossed with salt and sugar made it shed the same amount of liquid that it had taken three hours to release at room temperature. Cooling down our cabbage was easy: We simply chilled the dressing and then refrigerated the finished coleslaw for a few minutes. 

SERVES 4

Do not use a pre-shredded coleslaw mix with this recipe; its texture and flavor are inferior to fresh cabbage. If you don’t have a salad spinner, use a colander to drain the cabbage, and press with a rubber spatula to remove all excess liquid. When it comes to the sweetness level of coleslaw, tastes vary. For this reason, prepare the coleslaw as directed and then season to taste with up to 2 teaspoons of sugar or up to 2 teaspoons of vinegar, adding one teaspoon at a time.

INGREDIENTS

  • 1/4cup cider vinegar, plus extra for seasoning
  • 2tablespoons vegetable oil
  • 1/4teaspoon celery seed
  • 1/4teaspoon ground black pepper
  • 1/2large green cabbage (about 1 pound), cored and shredded fine (about 6 cups)
  • 1/4cup sugar, plus extra for seasoning
  • Table salt
  • 1large carrot, peeled and grated
  • 2tablespoons chopped fresh parsley leaves

INSTRUCTIONS

  1. 1. Combine 1/4 cup vinegar, oil, celery seed, and pepper in medium glass or metal bowl. Place bowl in freezer until vinegar mixture is well chilled, at least 15 minutes and up to 30 minutes.
  2. 2. While mixture chills, toss cabbage with ¼ cup sugar and 1 teaspoon salt in large microwave-safe bowl. Cover with large plate and microwave on high power for 1 minute. Stir briefly, re-cover, and continue to microwave on high power until cabbage is partially wilted and has reduced in volume by ¬one-third, 30 to 60 seconds longer.
  3. 3. Transfer cabbage to salad spinner and spin cabbage until excess water is removed, 10 to 20 seconds. Remove bowl from freezer, add cabbage, carrot, and parsley to cold vinegar mixture, and toss to combine. If desired, adjust flavor with sugar or vinegar. Season with salt to taste. Refrigerate until chilled, about 15 minutes. Toss again before serving.

Saturday, September 1, 2012

Chocolate Cupcakes with Buttercream Frosting


Oh my word, these were so scrumptious.  I brought these yummies to a cook out - attended by a bunch of hungry runners - and they disappeared before I had a chance to blink.  One runner said (and I quote!) "that may have been the best cupcake I've ever had."  The chocolate cupcakes themselves have the perfect amount of cocoa, are moist, fluffy, and aren't too sweet...allowing you to taste the chocolate more.  The frosting is definitely the BEST buttercream frosting I've ever had.  I have never used heavy cream in frosting before, and now I'll never stop!  Heavy cream makes the frosting so incredibly fluffy and melts in your mouth.  Using shortening in the frosting also gives it an amazing consistency; Not too runny, not too dense.  I don't think there's anything that compliments buttercream frosing better than rich, chocolate cupcakes. This recipe is truly perfection.

Yield: about 12 cupcakes

For the Chocolate Cupcakes:

Ingredients:

  • 1 1/2 cups all-purpose flour
  • 1 cup white sugar
  • 1/2 cup cocoa powder
  • 1 teaspoon baking soda
  • 1/2 teaspoon salt
  • 1/3 cup vegetable oil
  • 1 teaspoon vanilla extract
  • 1 teaspoon distilled white vinegar
  • 1 cup water

Directions:

  1. Preheat oven to 350 degrees F (175 degrees C). Lightly grease one medium cupcake pan or line with paper liners.
  2. Sift together the flour, sugar, cocoa, baking soda and salt. Add the oil, vanilla, vinegar and water. Mix together until smooth.
  3. Pour into prepared muffin pan (batter should be just below the rim, for large cupcakes. For medium cupcakes, pour batter 2/3 to 3/4 full) and bake at 350 degrees F (175 degrees C) for 18-25 minutes, or until a toothpick inserted in the center comes out clean. Remove from oven and allow to cool in pans for 15 minutes.
  4. After 15 minutes, carefully remove cupcakes from pan, place on wire rack, and allow to cool completely.  Frost generously with Buttercream Frosting (recipe below).


For the Buttercream Frosting:

Ingredients:

  • 1/2 cup shortening
  • 1/2 cup unsalted butter, softened
  • 3 cups confectioners' sugar
  • 1/4 teaspoon salt
  • 1 teaspoon vanilla extract
  • 1/2 cup heavy whipping cream

Directions:

  1. In a mixing bowl, cream shortening and butter until fluffy. Add sugar, and continue creaming until well blended.
  2. Add salt, vanilla, and 6 ounces whipping cream. Blend on low speed until moistened. Add additional 2 ounces whipping cream if necessary. Beat at high speed until frosting is fluffy, at least 5 minutes.  Frost cooled cupcakes.  

You will have some frosting left over (I had about a cup)...so you can either use it for another recipe or eat it by the spoonful...your choice(;

Friday, August 3, 2012

New Orleans Barbecue Shrimp


I'm usually not a fan of spicy things, but boy was this tasty!   I really recommend making it spicy.  Add lots of salt and cayenne in the end.  I don't know why, but this dish is so, so, so yummy and especially flavorful when spicy.  It's adapted from America's Test Kitchen, who have never failed to impress me with their recipes. Here's the description on the recipe:
We started by determining the best cooking method for our version of New Orleans Barbecue Shrimp; in this case, searing the shrimp first, then sautéing the aromatics before returning the shrimp to the skillet to gently finish cooking in the rich sauce proved best. Sautéing the aromatics with some tomato paste enriched the sauce—the paste also reinforced the “barbecue" color.
To thicken the sauce, we turned to a classic New Orleans technique for thickening: starting the sauce with a roux. A bit of flour added to the sautéing aromatics created a sauce that was thick enough to coat the shrimp. Instead of a time-consuming seafood stock, we used bottled clam juice as the base for our sauce. To round out the liquid, tasters preferred mellow beer to acidic wine.
Seems like they know what they're talking about...am I right?  They also said: although authentic barbecue shrimp is always made with shell-on shrimp, peeled and deveined shrimp may be used. Light- or medium-bodied beers work best here. Serve with Tabasco sauce and French bread, if desired.
Definitely serve this wish French bread!!  It does a wonderful job of soaking up all of the yummy sauce.  I wish I had made more of this to have as leftovers...but there were none left!
Ingredients:
  • 2pounds extra-large shrimp, peeled (21-25 per pound)
  • 1/2teaspoon salt
  • 1/2teaspoon cayenne pepper
  • 2tablespoons vegetable oil
  • 6tablespoons unsalted butter, cut into 6 pieces
  • 2teaspoons all-purpose flour
  • 1teaspoon tomato paste
  • 1teaspoon minced fresh rosemary
  • 1teaspoon minced fresh thyme
  • 1/2teaspoon dried oregano
  • 3garlic cloves, minced
  • 3/4cup bottled clam juice
  • 1/2cup beer
  • 1tablespoon Worcestershire sauce
  •                       Additional salt, cayenne pepper
  •                       Hot sauce (optional)
Instructions: 
  • 1. Sear shrimp: Pat shrimp dry with paper towels and sprinkle with salt and cayenne. Heat 1 tablespoon oil in large skillet over medium-high heat until just smoking. Cook half of shrimp, without moving, until spotty brown on one side, about 1 minute; transfer to large plate. Repeat with remaining oil and shrimp.
  • 2. Make Sauce: Melt 1 tablespoon butter in empty skillet over medium heat. Add flour, tomato paste, rosemary, thyme, oregano, and garlic and cook until fragrant, about 30 seconds. Stir in clam juice, beer, and Worcestershire, scraping up any browned bits, and bring to boil. Return shrimp and any accumulated juices to skillet. Reduce heat to medium-low and simmer, covered, until shrimp are cooked through, about 2 minutes. Off heat, stir in remaining butter until incorporated. Add more salt and cayenne to taste.  Serve and garnish with hot sauce if desired.

Sunday, July 15, 2012

Lemon Raspberry Muffins


I love raspberry and lemon together and I thought it would make the perfect breakfast muffin. And I was right.  It totally did.  These were unbelievably good.  (I know I say that about every recipe on this site, but I truly only add the best recipes, so you can trust me.)  These muffins have a perfect combination of sweet and tart.  I had some warm (with whipped cream!), and some cool, and they are amazing either way.  However, they tasted best - surprisingly...since most muffins taste best fresh from the oven - at room temperature the next day.  Once you make these muffins, you'll have one warm of course, since you can't resist...but with the remaining muffins, put them in a plastic bag when just the tiniest bit warm, seal it, and have them the next day.  The flavors mellow together and taste absolutely delicious.  The muffins are also incredibly moist, especially the next day after putting it in a sealed bag....more like a cupcake than a muffin.  Make sure to keep the muffins in the muffin tin while cooling; do not take them out of the tin and put them directly onto a cooling rack or else the outside will cool too quickly and get slightly crunchy/less moist.  Oh yeah!  I forgot to say the best part!  These are LOW FAT!   I can't even tell you how un-low fat these taste.  They only have 3 tablespoons of vegetable oil (healthy fat, as opposed to butter) among the whole dozen muffins.  I also made them with yogurt and egg whites, and the yogurt is key to what makes them so moist. This is going to be my go-to muffin recipe for now on!

Yield: 12 muffins

Ingredients:

  • 1/2 cup plain yogurt
  • 3 tablespoons vegetable oil
  • 3 tablespoons lemon juice
  • 2 egg whites
  • 1 1/2 cups all-purpose flour
  • 3/4 cup white sugar
  • 2 teaspoons baking powder
  • 1/4 teaspoon salt
  • 1 teaspoon grated lemon zest
  • 1.5 cups fresh raspberries
  • 2 tablespoons white sugar
  • Garnish: whipped cream (optional)

Directions:

  1. Preheat the oven to 400 degrees F. Grease a 12 cup muffin tin, or line with paper liners.
  2. In a large bowl, mix together the yogurt, oil, lemon juice, and egg whites. In a separate bowl, stir together the flour, 3/4 cup sugar, baking powder, salt, and lemon zest. Add the wet ingredients to the dry, and mix until just blended. Gently stir in the raspberries. Spoon batter evenly into the prepared muffin cups. Sprinkle remaining sugar over the tops.
  3. Bake for 13 to 17 minutes in the preheated oven, or until the top springs back when lightly touched, and a knife inserted in the center comes out clean (if raspberry sticks to it, that's okay...as long as no lemon batter does). Cool muffins in the tin on a wire rack.  I recommend having warm muffins with a dollop of whipped cream.  Store left over muffins in a sealed container/bag.


Thursday, June 28, 2012

Filet Steaks with an Irish Whiskey and Mushroom Cream Pan Sauce


Oh my goody goodness this was good.  Too good.  Way too good.  I'm still amazed I was capable of making such a wonderful dinner.  Last night, we had some left over heavy cream in the refrigerator from the Chocolate Fudge Truffle Cheesecake I made for my mom's birthday last week (you can find this sinful dessert recipe here), and since we almost never have heavy cream, I insisted that I make a dinner recipe using it.  My mom had already bought steak fillets, and I had a recipe saved that I had been wanting to try since it included heavy cream and whiskey (who could go wrong with these two marvelous ingredients!?).  So I altered the saved recipe based on what we had, and it turned out to be the best steak dish I've ever had.  My parents also agree.  It was absolutely perfect....the steaks themselves cut like butter, were super duper juicy, and had a wonderful, meaty flavor.  The sauce was unlike anything I had ever had before.  It had the dominant flavor of beef - from the stock - but the whiskey gave it a zesty burst of flavor, and the cream wasn't overpowering at all; in fact, my parents couldn't even tell there was any cream in the sauce.  It simply blended all the flavors of the ingredients together and made the sauce slightly rich.  I decided to add the mushrooms to the dish last minute, and boy am I happy I did because they went so perfectly with the rich, beefy sauce.  However, if you don't like mushrooms, they can easily be omitted.  This is a heavenly dish that is sure to impress.


Yield: 4 servings


Ingredients:
Four 1 to 1.25 inch pieces beef tenderloin (about 7.5 ounces each)
Kosher salt and freshly ground black pepper
1 tablespoon vegetable oil (if not using a cast iron pan)
1 tablespoon unsalted butter
1 tablespoon finely chopped shallots
5 white mushrooms, sliced (optional)
1/4 cup Irish Whiskey, such as Jameson
1/2 cup beef stock 
1/2 teaspoon Worcestershire sauce
2 teaspoons Dijon mustard
1/2 cup heavy cream
1/2 to 1 teaspoon lemon juice


Directions:

1.
Season each steak generously with salt and pepper. Heat a heavy-based (preferably cast-iron) skillet that's large enough to hold the steaks over high heat until quite hot. (Add the 1 tablespoon vegetable oil if not using cast iron.) Test by touching the edge of one steak to the pan surface; it will sizzle briskly when ready. Immediately drop in the steaks and sear one side for 2 minutes. Sneak a peek to see if the first side is nicely browned. If not, continue to sear that side for another minute or so. Flip the steaks and sear the other side for 2 to 3 minutes. Reduce the heat to medium high, cook for another 2 minutes, flip, and cook until a digital instant-read thermometer in the center of the meat reads 120 degrees F for rare or 125 degrees F for medium rare, another 1 to 2 minutes. Transfer the steaks to the warm platter and let them rest, covered loosely with foil, while you make the sauce.  You can also set the steaks in a separate skillet and place on the "warming" section of your oven if you have it.
2.
To make the pan sauce: Return the unwashed pan to medium heat. Add the butter and let it melt (be careful not to let it burn if the burner is still very hot!). Add the shallots and and cook, stirring, until fragrant and just tender, 1 to 2 minutes.  Add the whiskey and mushrooms and stir with a wooden spoon, scraping up any browned bits stuck to the pan. Add the broth and Worcestershire sauce , raise the heat to medium high, and bring to a boil. Whisk in the mustard and then the cream. Continue to cook at a boil, stirring, until reduced to a saucy consistency, 5 to 7 minutes. Taste the sauce and season with salt, pepper, and lemon juice. Place a steak on each plate, drizzle with the juices left in the steak pan, and serve the steaks with the mushroom cream sauce.

Thursday, June 14, 2012

Churros


I will never forget the first time I had a churro.  I was at a local mall, walking by the Great American Cookie store (best place ever!), and I begged my mom if I could get something due to my caving in toward the mouth-watering smells of baked goods.  She said yes, of course, and I was about to order a couple cookies when I spotted a long, sugar coated, stick-like thing - a churro.  Since I was in Spanish at the time, I had heard of them and seen them in my textbooks.  I knew they were a popular breakfast/snack item in Mexico and Spain, and people often ate them with coffee or chocolate.  So I decided to try one...and I loved it sooo much.  It was crunchy on the outside, with a sweet, cinnamon sugar coating, and super moist, cakey, and soft on the inside.  It was like a cinnamon sugar donut, but ten times better.  This morning, I decided to try making it myself.  I was surprised at how easy the recipe I had saved was; there were no eggs, and the dough itself only had three main ingredients (vegetable oil, sugar and flour).  The result was even better than the churro I had at the cookie store! Mine literally -->melted in your mouth<--, and were incredibly addicting.  I think mine tasted so much better because they were fresher and very warm, whereas the one I had at the mall was room temperature and had probably been made a few hours earlier.  I was planning on saving one of my churros to see how it tasted at room temperature, but they didn't last that long - now that I think about it... the lasted maybe five minutes. These are very tasty with coffee, chocolate, or dipped in caramel sauce, but I love them the most hot from the frying pan - coated in lots of cinnamon sugar - with a refreshing, cold glass of milk on the side.  Yum.

Yield: about 2 to 3 servings (about 8 donut-hole sized churros, and 3 larger, long ones)

Ingredients:

  • 1 cup water
  • 2 1/2 tablespoons white sugar
  • 1/2 teaspoon salt
  • 2 tablespoons vegetable oil
  • 1 cup all-purpose flour
  • 2 quarts oil for frying (I used vegetable oil)
  • 1/2 cup white sugar, or to taste
  • 1 teaspoon ground cinnamon
Directions:
  1. In a small saucepan over medium heat, combine water, 2 1/2 tablespoons sugar, salt and 2 tablespoons vegetable oil. Bring to a boil and remove from heat. Stir in flour until mixture forms a ball.
  2. Heat oil for frying in deep-fryer or deep skillet to 375 degrees F (190 degrees C). Pipe strips of dough into hot oil using a pastry bag, or make round, bite sized balls with your hands.  Fry until golden; drain on paper towels.
  3. Combine 1/2 cup sugar and cinnamon. Roll hot, drained churros in cinnamon and sugar mixture.

Saturday, June 9, 2012

Blueberry - Coconut - Nut Muffins


Does that picture look yummy or what?  Nutty, sweet and fruity, this muffin bursts with the flavors of the tropics.  The one-two punch of coconut and macadamia nuts in this luxurious muffin will make you think you’re having your morning coffee in Hawaii <. This recipe was adapted from Eating Well Magazine, and is every bit as delicious as the picture.  I altered it a little based on what I had on hand, and it turned out so amazing.  This was my first time making a really killer blueberry muffin, and I wouldn't change anything about the recipe.  Also, these muffins are surprisingly healthy!  They're made with whole wheat flour, healthy oils, and fresh fruit, so you don't have to feel guilty about eating more than one(: Drizzle them with honey and a dollop of whipped cream for an added touch of sweetness.


Make Ahead Tip: Store, individually wrapped, at room temperature for up to 2 days or in the freezer for up to 1 month. To reheat, remove plastic wrap, wrap in a paper towel and microwave on High for 30-45 seconds.


Yield: 12 muffins

Ingredients: 
1/4 cup sweetened coconut; 
2 tbsp plus 3/4 cup all-purpose flour, divided; 
2 tbsp plus 1/2 cup brown sugar, divided; 
5 tbsp chopped macadamia nuts (or any other nuts of your preference), divided;
2 tbsp vegetable or canola oil, divided; 
1 cup whole-wheat flour; 
1 tsp baking powder; 
1/4 tsp baking soda; 
1/8 tsp salt; 
1/2 tsp ground cinnamon; 
1 large egg; 
1 large egg white; 
3/4 cup nonfat buttermilk (regular is fine too); 
2 tbsp butter, melted; 
1/2 tsp coconut or vanilla extract (I used vanilla, but I wish I had coconut!!); 
1 1/2 cups fresh blueberries (make sure they're not wet, or they will sink to the bottom)
Garnish/toppings: honey, butter, and/or whipped cream (optional)

Instructions:
1. Preheat oven to 400°F. Coat a 12-cup muffin pan with cooking spray.
2. Combine coconut, 2 tablespoons all-purpose flour, 2 tablespoons brown sugar and 2 tablespoons macadamia nuts in a small bowl. Drizzle with 1 tablespoon oil; stir to combine. Set aside.
3. Whisk the remaining 3/4 cup all-purpose flour, whole-wheat flour, baking powder, baking soda, salt and cinnamon in a medium bowl. Whisk the remaining 1/2 cup brown sugar, the remaining 1 tablespoon oil, egg, egg white, buttermilk, butter and coconut (or vanilla) extract in a medium bowl until well combined. Make a well in the center of the dry ingredients and pour in the wet ingredients; stir until just combined. Add blueberries and the remaining 3 tablespoons nuts; stir just to combine. Divide the batter among the prepared muffin cups. Sprinkle with the reserved coconut topping and gently press into the batter.
4. Bake the muffins until golden brown and a wooden skewer inserted in the center comes out clean, about 15-20 minutes. Let cool in the pan for 10 minutes, then remove from the pan and let cool on a wire rack at least 5 minutes more before serving.
5.  Serve warm with desired toppings.